Wi-Fi offers the benefits of convenience and being good enough for most uses. However, ethernet offers the benefits of better speed, lower latency, and more reliable connections. So, when a network connection requires maximum speed and stability, you should wire the connection for the best results. Also, security cameras, gaming PCs, consoles, and devices for high-quality entertainment like 4K video streaming require faster communication, so you should consider choosing cables. However, which type of network cables do you need? Let’s read the network cable guide to find the answer.
What Are Network Cables?
Network cables link one network component to another or connect two or more nodes to share resources to cut operational costs and increase efficiency.
Some shared resources include scanners, printers, storage spaces, and computing power. Depending on the robustness and physical and logical topologies, you’ll need to use different cables within the network topology.
There are various technologies used for network linkages. Short distances in offices, patch cables are mainly in use. Twisted pairs or coaxial cables are ideal for premises. Optical fiber cables are the best for long distances for applications requiring massive bandwidth. Power lines are primarily for network links in homes and industrial applications.
Network Cable Guide: Network Cables Types
Below are the various network cable types.
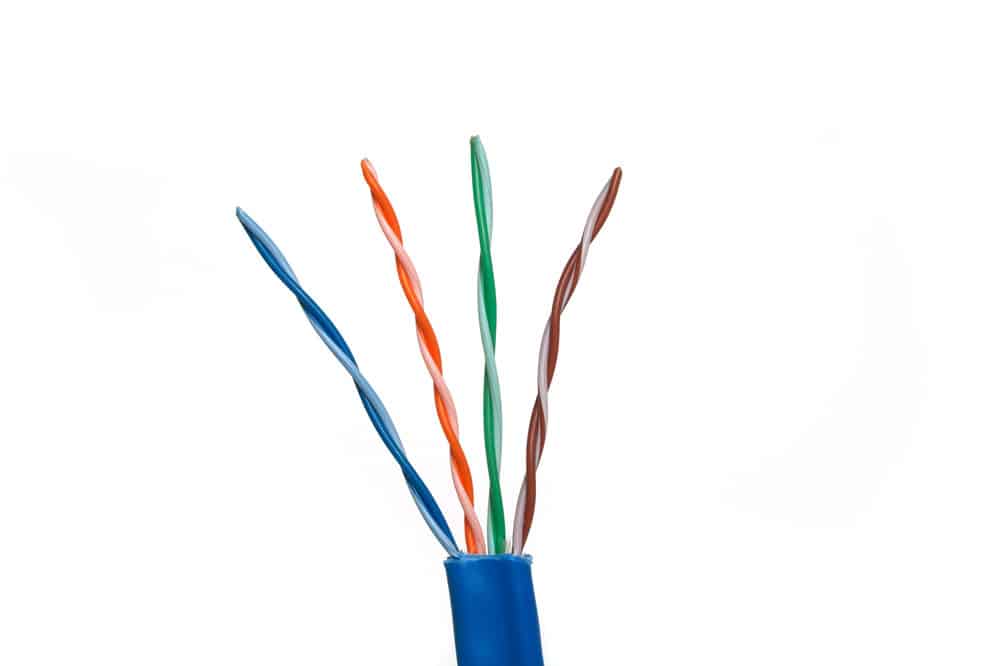
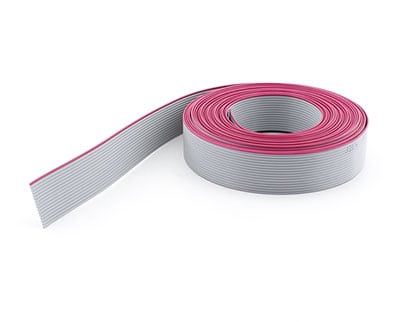
Twisted Pair
The twisted pair has two copper conductors with a plastic insulator material. One of the wires transmits signals to the receiver and the other acts only as a ground reference. This cable is for home and corporate communication networks. There are two types of twisted pair cables, namely shielded and unshielded. You can use twisted-pair cables for various applications in networking and communication, for example, in telephone lines, Digital Subscriber Lines, and local area networks.
Caption: Twisted Pair
Ethernet Crossover Cable
An Ethernet crossover cable connects computing nodes directly within the network. It links two components of the same type, for instance, when connecting two computers or switches within the network. However, most network components nowadays support auto crossover technologies.
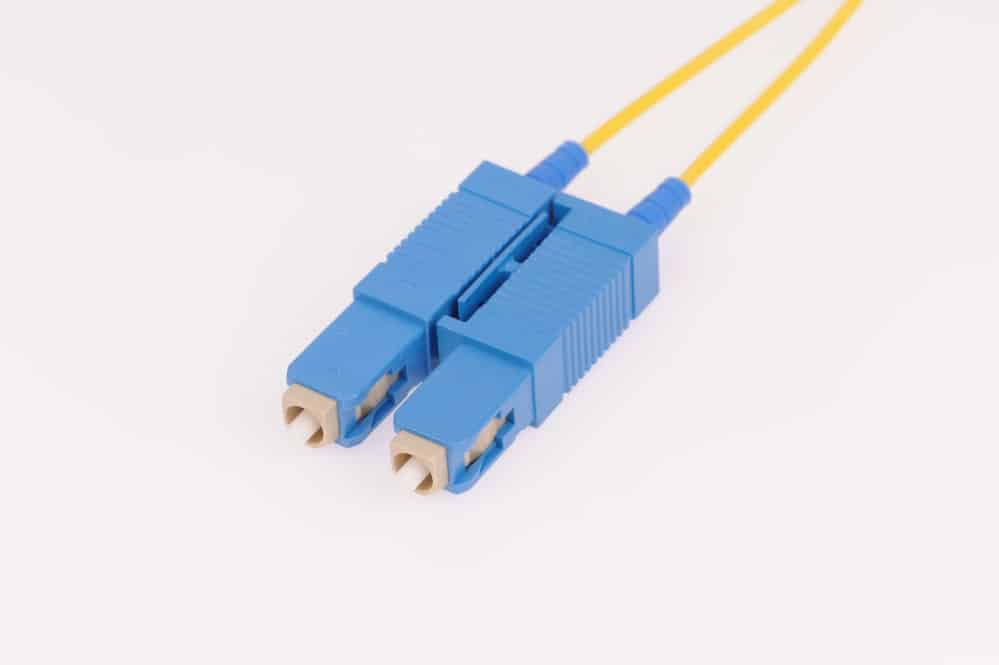
Fiber Optic Cable
You can call it optical–fiber cable, which is an association similar to an electrical cable but has one or more optical fibers that transmit light. The optical fiber components are usually in plastic layers and a protective tube suitable for the environment to install the cables. Various types of cables use diverse applications, for example, long-distance communications or providing a high-speed data connection between different parts of a network within the premises.
Fiber-optic Cables are responsible for transferring more data over longer distances and faster than other mediums. This technology provides homes and businesses with fiber-optic internet, phone, and TV services.
Caption: Fibre Optic Cable
Coaxial Cable
It is a network cable consisting of an inner conductor surrounded by a concentric conducting shield insulated by a dielectric material. Most of these cables also have a protective outer jacket. Coaxial cables mainly carry high-frequency signals with low attenuations. It’s mainly for telephone lines, high-speed computer data cables, and television cable signals. They also connect radio receivers and transmitters.
Caption: Coaxial Cable
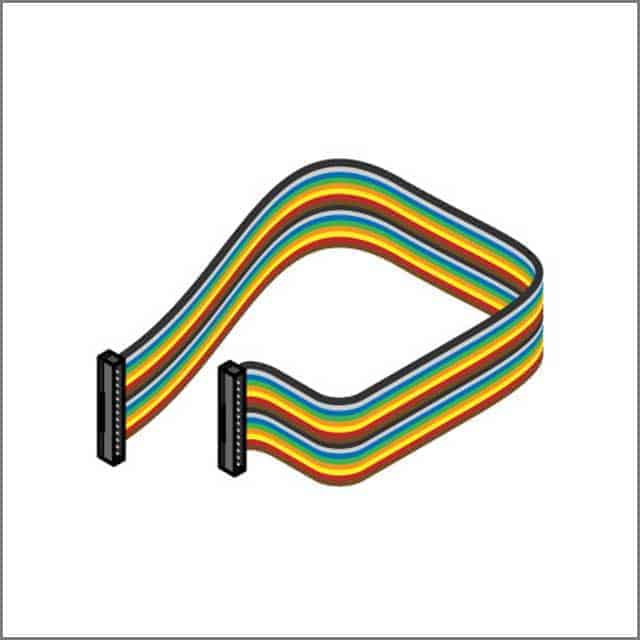
Patch Cable
It links digital and optical devices to one another for signal transmission. It helps to attach or link devices of diverse types. For instance, they are connecting a hub or router to a computer. They are commonly produced in many different colors to differentiate them from each other. Patch cables include headphone extensions, microphone cables, and modular Ethernet cables.
You can use the patch cable as the ethernet cable because both are the same in copper networks. However, patch cables are best suited for smaller distances from the patch to the switch.
Caption: Patch Ethernet Cable
Power Lines
PLCs carry data on a conductor used simultaneously for AC power transmission or power distribution to end users. We need different PLC technologies for various applications, from internet connectivity to home automation. Often PLC technologies confine themselves to a specific type of wire, but some occasionally cross between different levels. Usually, transformers obstruct propagating signals that require numerous technologies to form extensive networks. Various frequencies and data rates are used in a variety of situations.
Conclusion
When choosing a Cable for a network, the network cable guide helps you with several factors to consider, such as expansion capabilities, cost, signal attenuation, bandwidth, and electromagnetic interference (EMI). Every network system requires specific needs, and each cable has a different specification to fulfill them. These will affect the network design; hence, you need to consider four critical considerations if you want a reliable, secure, and efficient network. These include inbuilt security measures, standardization of software and hardware, network resiliency, and redundancy. For all your network equipment-related queries, feel free to contact Cloom Tech.
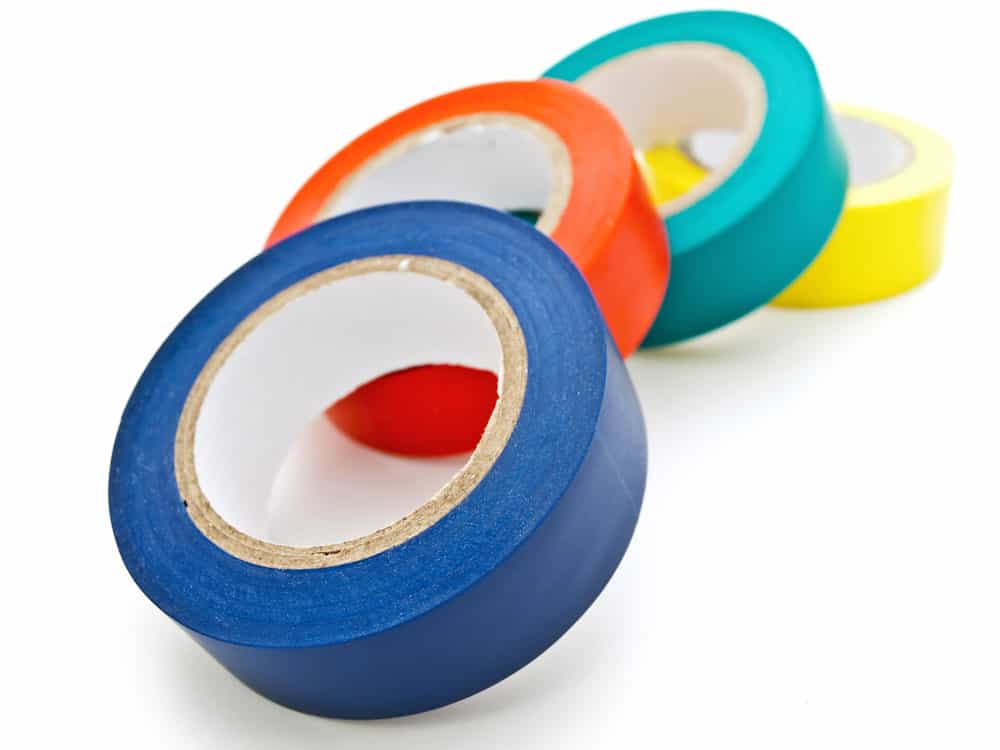
The tape acts as an adhesive and is available in different materials. There are several types of adhesives, each serving a specific function. Choosing the wrong tape could damage a wire’s insulation. And compatibility with wires and temperature resistance should guide your choice. However, a better option is a non-adhesive wire harness tape or the self-amalgamating tape made of silicone or rubber and lacks adhesives. The tape only sticks to itself, tightly wrapping the wire to protect against liquids, making them the ideal choice, especially in automotive wire harnesses.
What Are Self-Amalgamating Tapes/non-adhesive wire harness tape?
Self-amalgamating tapes are non-tacky silicone or rubber tapes stretched and wrapped around components like cables, hoses, pipes, and electrical joints. They bonded into a waterproof, rubbery, seamless, strong, and electrically insulating layer. Unlike most fibers and polymers, these tapes have heat, sunlight, and weather resistance. In the US, they’re described as self-vulcanizing or self-fusing.
Self-Amalgamating Tape vs. Silicone Tape Comparison
Which tape should you use between the two? The self-amalgamating tape will be ideal for those working in the automotive industry. Silicone tape will serve you better when dealing with pipes and cabling. Why? Let’s compare them.
Material
Manufacturers make self-amalgamating tape using EPR, EPDM, butyl, or PIB rubber. On the other hand, to make silicone tapes, they use a silicone elastomer, which, although referred to as silicone rubber, does not contain any rubber.
Performance
Self-amalgamating tape is heat resistant, allowing it to withstand temperatures up to 130 degrees Celsius, whereas silicone tape is 260 degrees Celsius. However, silicone tape tends to have greater resistance levels to cold than self-amalgamating tape since it can remain flexible even at temperatures of -65 degrees Celsius. It is also the same for tensile strength, which is about 450PSI to 950PSI for silicone and 150PSI to 300PSI for self-amalgamating tape.
Color
Another advantage of silicone tape is that it is easier to color, making it more commonly used throughout various applications. Self-amalgamating tape is only available in black and white colors.
Bonding strength
Compared to self-amalgamating tape, one of the most significant advantages of silicon tape is fusibility, which also refers to bonding strength. The high fusibility levels of silicone tape that often occur within a few seconds or minutes mean that it is more widely used than self-amalgamating tapes.
Caption: Various tape colors
Self-Amalgamating Tape Application
Self-fusing silicone tape is highly robust regarding consistency, which usually occurs over a long period. It will also not get stiff or brittle or leave any sticky residue because it doesn’t have an adhesive. The other significant advantage of silicone tape is its stretching ability and ability to withstand high temperatures.
Self-fusing silicone tape tends to be very thick, about 20 mils. If you decide to double or triple-layer it, the whole thing will look unappealing and probably get in your way. On the other hand, if you use minimal amounts, there may not be sufficient contact, which you need to create a good bond over time.
That kind of tape is also very soft, which causes it to grab or catch even the mildest sharp corners or surfaces. Such a structural tendency means that having the tape bare on the outer surface of a wire bundle can lead to problems. Shifting the harness around may also cause you to pull and stretch silicone tape inadvertently.
Despite IMO being the most significant advantage of self-fusing silicone tape, it is also its most critical problem. It is because self-fusing means that you must maintain each taped area separate from the others. Ensure they don’t stick to each other, meaning that you will never be able to store your harness by rolling it up whenever you need to.
Properties of Self-Amalgamating Tape
Below are some of the properties of the self-amalgamating tape.
Self-Bonding
Self-amalgamating tape lacks the sticky adhesive characteristics of electrical tape. It means that it tends to bond, leading to a watertight seal. In the case of electrical tape, it starts to ooze its adhesive whenever it’s heated, creating a sticky mess inside the car. Because it is also self-vulcanizing, its removal process is easy, making it ideal for conducting fast automotive repairs.
Heat-Tested
Self-amalgamating tape can withstand extreme temperatures emitted by a car’s engine. Each type of tape produced gets tested up to a specific temperature and is flame retardant.
Weather Proof
When appropriately utilized, the self-amalgamating tape can create a weatherproof seal. It helps protect the wire harness from engine oils and fluids that can seep through. Other elements, like moisture, can also get into the engine. In the case of silicon tape, it is not specially designed to offer protection against the weather and humidity. As a result, it is most likely to lose its adhesive properties and pull away from the harness.
Common Causes for Wire Harness Repair
When looking at the automotive sector, wire harness tape is something you can use across various applications. In most cases, antique vehicles may require their wire harness rebuilt, which means new wrapping once you splice all the correct wires. That said, the following are some common causes of wire harness repair.
Extensive Body Damage
Most kinds of harness run within the body panels of a car. Therefore, the wires inside the body can also sustain damage whenever an accident occurs.
Improperly Installed Harnesses
After-market components for a car, like a new stereo, are usually installed in a hurry using electrical tape. These kinds of quick-fix wire harnesses can lead to faster degradation resulting in a need for wiring repairs.
Water Damage
It is one of the most common causes of electrical failure in cars, typically leading to the harness having to be rebuilt. Water damage can also result from rusted-out body panels, allowing it to reach the harness.
Improperly Routed Wiring
In most cases, anybody repairing or doing major engine work will mean removing wiring. As a result, these wires can be improperly routed during the fixing process, causing them to be nearer to a heat source, eventually leading to different kinds of electrical damage.
How Does Self-Amalgamating Tape Work?
The self-amalgamating tape uses chemical bonds that lead to the permanent bonding of two layers of the tape. You can also refer to the process as vulcanizing or cross-linking, which takes place on a molecular level. You will also find handling the tape easy and pliable before bonding. However, once the bonding occurs and given time to set it, it will become permanent, resulting in a mold-like material forming around whatever component you apply it to.
How Can One Apply Self-Amalgamating Tape
You do not need gloves or special protective materials to fix self-amalgamating tape. Using a blade or some scissors will do the trick.
You can use some magic tape to ensure that the tape does not adhesively bond to itself. The tape consists of shielding, a plastic layer you can easily peel away to roll up the tape as needed and ship. So you will have to peel back a section of the shielding plastic, stretch the area of the tape you wish to apply, and then cover it around the item you are trying to shield. You will then take an additional piece of tape, stretch it, and cover it so that around ½ of it overlaps the other prior layer. Drawing back the tape as you do the installation will create a tight wrap and, more importantly, enable it to better amalgamate or adhere to itself as you cover it.
What Duration Does Self-Amalgamating Tape Take to Set?
The bonding process typically takes a couple of minutes for both tape layers to amalgamate. Even though your wrapping method does not have to be perfect on your first try, you must make the necessary adjustments as soon as possible before the bond settles. You will also need to ensure that you create a close-fitting overlapping wrap. It will enable you to get the results you want from the self-amalgamating tape.
What Amount of Time Can Self-Amalgamating Tape Last?
Usually, a self-amalgamating tape lasts for years, but in some cases, even decades. Using such tape also avoids problems normally associated with adhesives, which typically don’t hold up well when placed in high or low-temperature situations.
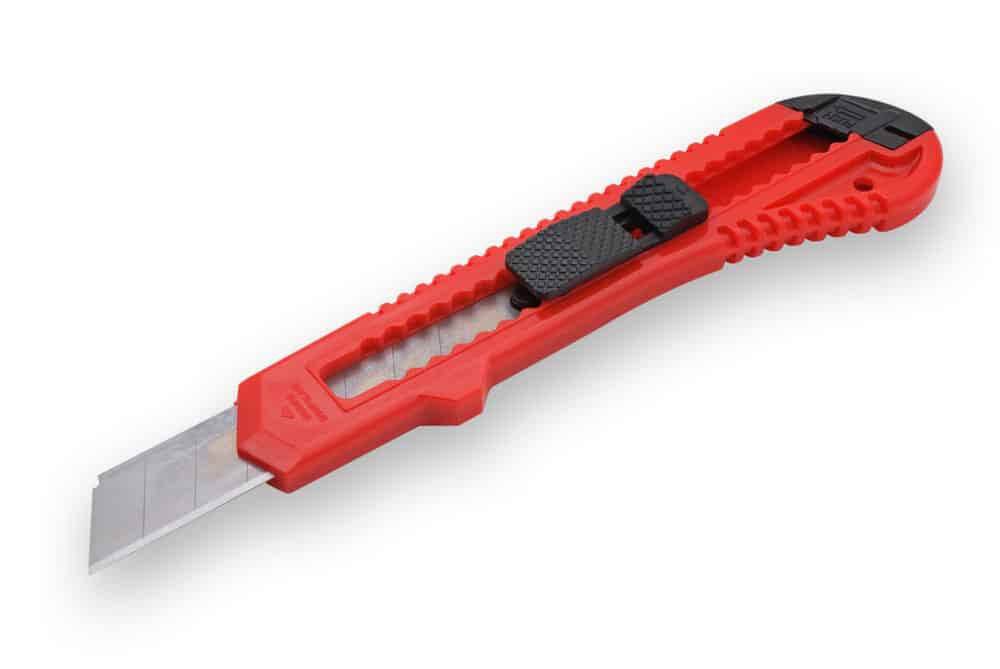
What is the Process of Removing Self-Amalgamating Tape?
Since self-amalgamating tape lacks adhesive, you can easily remove it with a box cutter or blade. However, it would be best to exercise caution to avoid damaging whatever is beneath the tape while cutting.
Caption: Box Cutter
Conclusion
When dealing with automotive wire harnesses, electrical tape typically does the job. However, only for a short while. Electrical tape bonds utilize harsh adhesives and glues that break down in places of high temperatures. If you need to pull the harness, bring a wet napkin.
On the other hand, self-fusing tape bonds to itself without glue, creating a customized rubber sleeve. The chemical bonding on the tape will also not break down under the harsh environmental conditions within a vehicle’s hood. In some cases, it can withstand temperatures of as high as 65°F to 500°F, which duct and electrical tapes do not even come close to. Feel free to contact Cloom Tech with any related queries.
A LAN port requires an ethernet cable and two compatible devices to serve its intended purpose. To create a connection, plug the cable into the LAN port of the device connected to the internet, for example, a modem, and connect the opposite end of the cable to your game console or computer. Understanding the LAN cable color code will help you assemble your ethernet cable.
What Is A LAN Cable?
LAN cables, also known as Ethernet cables, consist of copper wires and are available in several categories, with the most common ones being the Cat 5e and the Cat 6. These kinds of cables can execute their functions with the help of an RJ45. It is a component located at the end of the Ethernet cable that’s inserted into a LAN port.
One interesting fact about these cables is that despite the widespread use of the RJ45 connector in LANs, the LAN port is also called an RJ45 Ethernet socket or RJ45 port.
That said, the category of Ethernet cables used to connect your computer devices will mainly depend on the transfer rate capabilities of the network you are using. When dealing with lower categories of 3 – 5, the support transfer rate is typically 10 Mbps to 100 Mbps with a maximum band of 100 MHz. However, the use of such cables has stopped because of the different advancements in data transfer rates and bandwidth.
RJ45 Connector
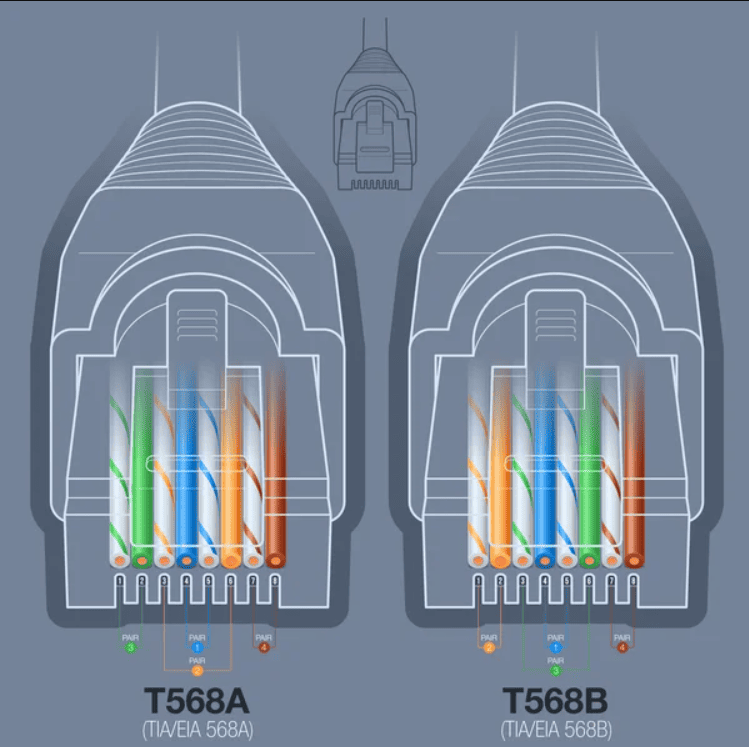
The RJ45 connectors come in two variations: the T568B and T568A. These serve as pins Out and In for Ethernet cables facilitating data transfer. However, the primary difference between the cables is the wiring, which comes in orange and green pairs.
RJ45 Cable Pinout Color Code T568A
The T568A is one of the most commonly used pin-out variations with Ethernet cables. One of its main features is its compatibility with single-pair and double-pair standards, referred to as USOC.
RJ45 Cable Pinout Color Code T568B
The standard variation provides better protection against noise. It can also isolate a signal more efficiently than the T568A. However, it’s only backward compatible and has a single-pair USOC wiring setup.
Caption: LAN Cable Color Guide
Straight-Through Ethernet Cable vs. Crossover Ethernet Cable
You should always exercise caution when setting them up and ensure modification of all cables and connectors based on the standards.
What Is Straight Through Cable?
Straight-Through cable is a set of twisted cables used in LANs to connect a computer to a network hub like a router. It’s an alternative to wireless connections where someone uses more than one computer to access a router via a wireless signal. The wiring pins of a Straight-Through cable also match with T568A and T568B.
T-568A Straight-Through Ethernet Cable
The T-568A is a standard cable usually used for first-time network installations since many existing cables are T-568B. However, there are no functional differences between the two.
T-568B Straight-Through Ethernet Cable
The T-568B and T-568A are standard Straight-Through cables that most people use to patch up cords for their Ethernet connections. On the other hand, if you want to connect more than one Ethernet device straight with a single cable without having to use a hub or connect more than one hub, you will have to get a Crossover cable.
What Is Crossover Cable?
It is an Ethernet cable that connects several computers directly. Unlike the Straight-Through cable, one uses the RJ45 crossover cable with two different wiring standards at each end, which are T568A and T568B. It is often used when connecting two machines of the same nature i.e.
An effective method of not forgetting how one should wire crossover Ethernet cables is wiring one end with a T-568B standard and the opposite end with a T-568A standard. All you need to do for the color code is to interchange the green wires with the pair of Orange wires. In particular, start by switching the solid G (Green) for the solid O (Orange). Then, switch the White/Green with the White/Orange.
Straight Through Vs. Crossover Cable, Which to Choose?
In most cases, people use Straight-Through cables to connect different devices and crossover cables to connect similar ones.
Straight-Through
When switching to the router
When switching to a server or PC
For a hub-to-server or PC
Crossover
Between two switches
When switching to a hub
When switching from hub to hub
From router to router
From a router Ethernet port to a PC NIC
From PC to PC
Is It Necessary To Differentiate Them?
A straightforward answer to the above question is yes since a standard computer network port has both input and output lines. When you link your computer to a switch or hub, the former has inputs connected to the outputs found on the machine’s port. The outputs are also connected to the computer’s inputs.
When you link two computers without an intervening hub, the cable will connect two inputs and two outputs, resulting in poor performance. A crossover cable for Ethernet or a null cable for connecting can remedy the problem by crossing the signals.
When dealing with most modern computers and hubs today, you may discover an auto-sensing issue where crossover cables are not used. Autosensing determines the ins and outs, making internal crossover necessary.
The basic theory of Ethernet Cable Color-Code Standards
When you look at the T-568A UTP Straight-Through cable, crossover cable, and the T-568B end, you’ll notice the linking of a transmitter (TX) pins to matching receiver (RX) pins and are minus-minus and plus-plus.You will also find that the brown and blue wire pairs on the fourth, fifth, seventh, and eighth pins aren’t used in any of the standards. However, you may also notice the same pins have no use or are not needed in 100BASE-TX. So the question becomes, why should one bother using such wires? The answer is that you can easily make a connector by grouping all these wires. Failure to do so will mean spending more time placing those tiny wires into the respective holes found in the RJ45 connector.
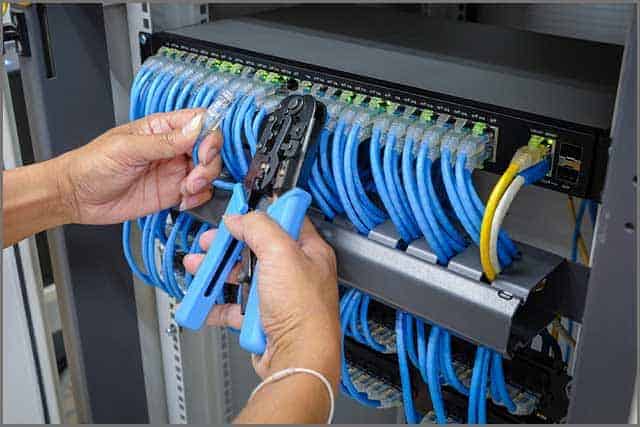
How to Make Your Ethernet Cable
Making your Ethernet cable for both categories 5 and 6 involves the following steps:
Spool Out Your Length of Cable
You should begin by pulling out enough cable to run the required installation length. Make sure that it is sufficient to trim several inches from both ends. Pulling it out a bit longer is always better than needing more cabling halfway through.
Strip Off the External Jacket
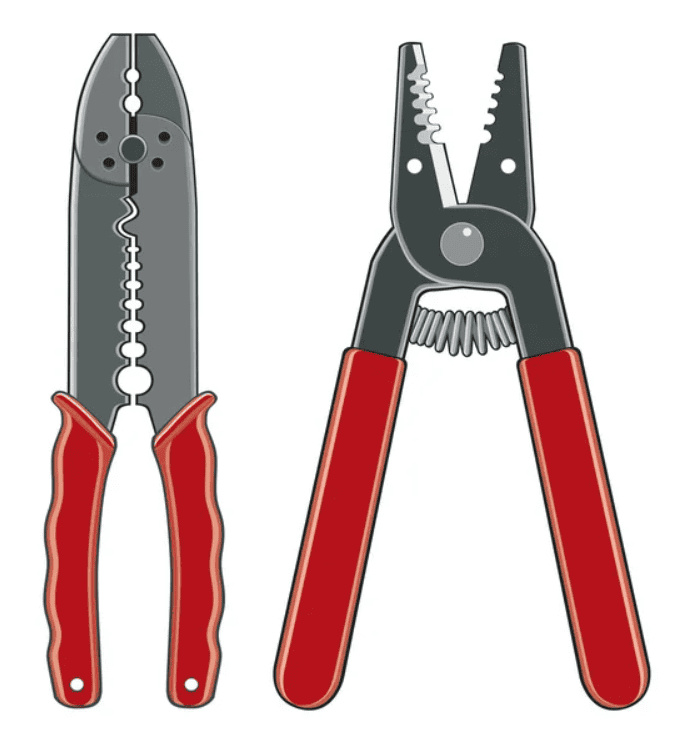
You should insert your cable into the wire stripper and rotate it around the cable until the entire circumference of the outer jacket is fully cut. Proceed to inspect the inner wires to ensure none of them got nicked. If any of them happen to have exposed wire, you will need to make adjustments to your blade and start the process again.
Caption: Wire Strippers
Lan Cable Color Code: Separate the Wires in Pairs
You should untwist all four pairs of wires and straighten them as best possible. If you see a plastic divider or white fibers in the center, you can begin to trim it off.
Lan Cable Color Code: Set Your Wires Accordingly
It would help if you lined up any individual wires in a specified order. Use your index finger and thump to straighten them out and ensure a good grip to keep them in order.
Lan Cable Color Code: Cut the Wire
It would help if you cut the wires flush around half an inch from where you stripped off the cable’s jacket. Ensure to leave enough of it so the ends of the wire can reach the pin connectors. Enough cable should go inside the connector housing so the crimp tab can come down on top of the jacket and keep it in place.
Lan Cable Color Code: Place the Wires into the Connector
At this point, you should go on and insert the wires into the connector and ensure it’s oriented correctly. The release tab ought to be facing downwards toward the ground. You must also ensure that all the wires remain in the correct order after they’re pushed fully into the pins.
Crimp the Connector
Insert the connector with wire within the 8P8C slot found on your crimp tool, and then give it a strong squeeze to ensure it goes through the full range of motion. Pull your connector from the crimp tool and repeat the steps on the other end of your cable.
Conclusion
Connectors come in two standards, T568A and T568B. A cable can have similar or different connectors at both ends. For networking, feel free to contact Cloom Tech.
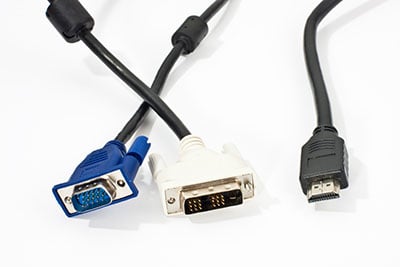
Are you looking for a custom DVI cable? Do you need help selecting the right cable?
You will get a variety of video cables to suit a wide range of needs. Even DVI cables come in different formats and configurations. So how do you go about choosing the right one?
This guide will provide all the information you need to become a pro on DVI cable. Then you can use your knowledge to buy the right DVI cable. You will get to know about the following:
Different DVI formats
Their use and differences from other cables
Places to purchase DVI cables
Chapter 1: About DVI Cable
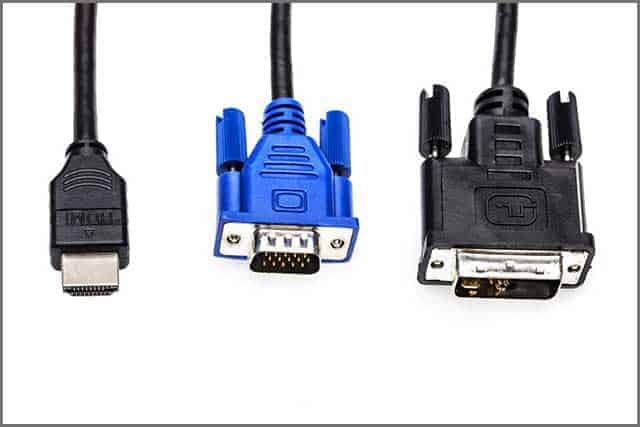
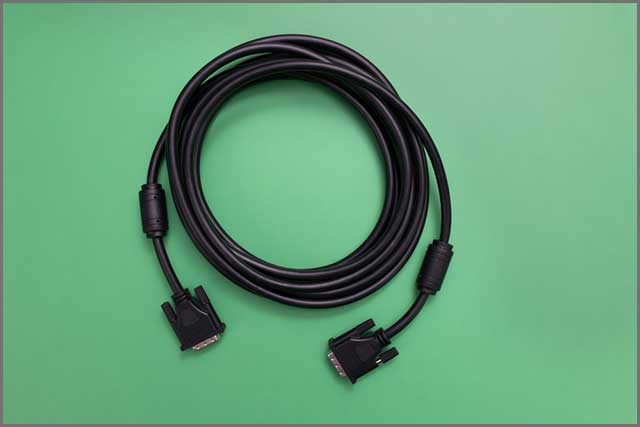
DVI is among the many video cables you find in the market. DVI stands for digital video interface. You can use a DVI cable for LCD monitors and modern GPUs. Before we go into the depths of DVI, let’s check out the main types of cables.
DVI is among the many video cables you find in the market. DVI stands for digital video interface. You can use a DVI cable for LCD monitors and modern GPUs. Before we go into the depths of DVI, let’s check out the main types of cables.
VGA Cable
IBM developed the VGA or Video Graphics Array format. You can use VGA cables for most televisions and computer monitors. VGA cable has a 15-pin connector. You can get a maximum resolution of 2053 x 1536 pixels.
VGA cables only transmit analog signals.
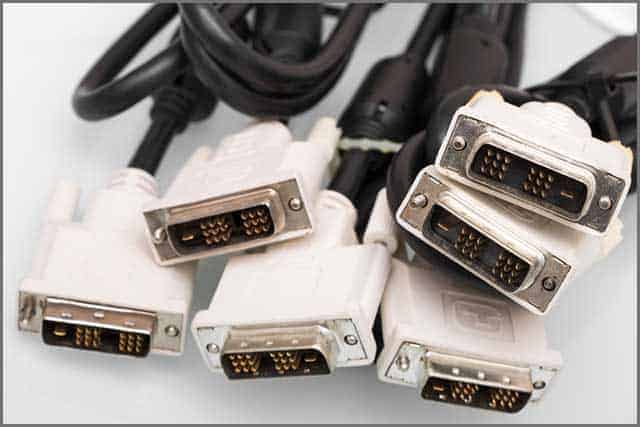
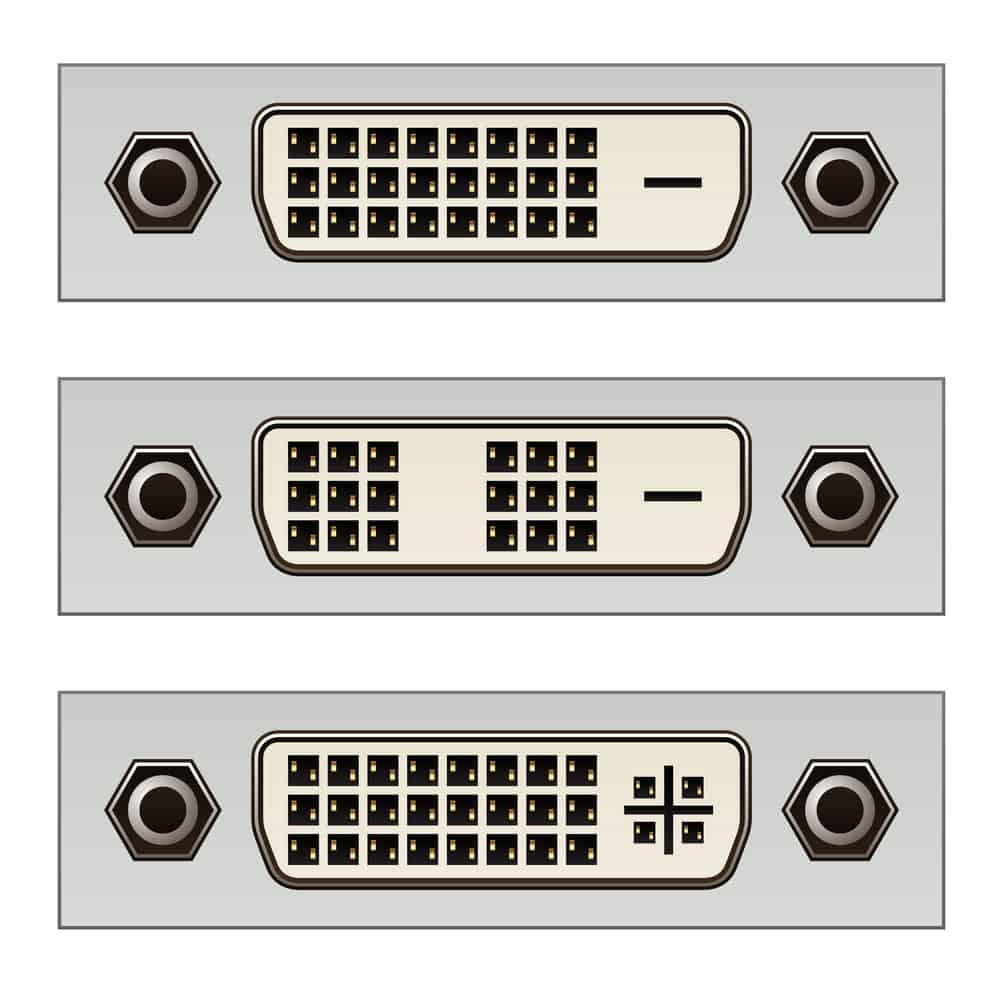
DVI Cable
DVI cable can transmit uncompressed digital video signals. You can also use different types of DVI for carrying analog signals. DVI cables come in different formats like DVI-D, DVI-A, and DVI-I.
DVI cable offers higher quality and resolution compared to VGA cables.
HDMI Cable
Many TVs and PC monitors use HDMI cables. HDMI stands for High-Definition Multimedia Interface. It is the most common cable for home theater systems as it supports 3D video signals.
DisplayPort Cable
DisplayPort cables are available in one, two, and four-link formats. They have high data capacities of up to 17.28 Gbit/s. Many devices like monitors come with a DisplayPort and support up to four 1920 x 1200 monitors.
DVI Vs. HDMI: Major Differences
HDMI supports both audio and video. DVI only supports video signals. You need a separate cable for audio.
DVI is not compatible with HDCP encryption. You may not be able to play HD content or Blu-Ray videos.
DVI is more common for LCD monitors and computers. HDMI is the default cable for smart TVs, HDTVs, and home theaters.
Dual-link DVI can support resolutions up to 2560×1600 pixels. HDMI can support up to 1920×1200 pixels.
DVI cable has three formats. On the other hand, HDMI has five different connector types.
HDMI may be more user-friendly than DVI cables.
The next chapter will look at the top things to consider in a custom DVI cable.
Chapter 2: Top Things to Look for in Custom DVI Cable
Have you placed an order for a custom DVI cable?
Before you put your cable to use, there are a few things to check. You need to make sure your custom DVI cable matches your specifications. Only then can you use it effectively.
Here are the most important things to look for in a custom DVI-
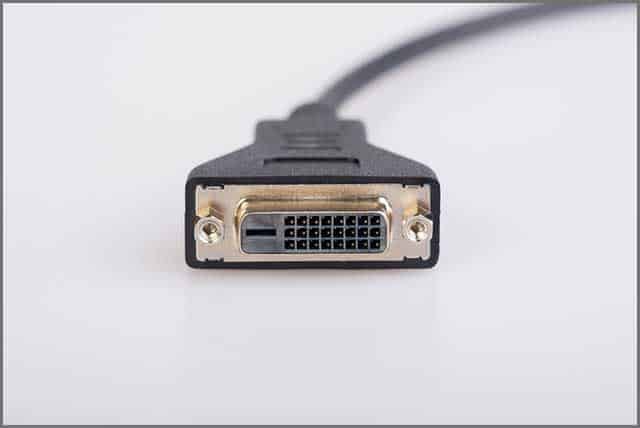
DVI Connector
The DVI connector is the first thing you should check. Make a count of the pins to ensure they match your design. The number of pins and their arrangement should also be on your inspection list.
You can count the pins to determine whether it’s DVI-D, DVI-I, or DVI-A.
The arrangement will also tell you whether it’s a single link or a double link.
Cable Length
The next thing to check is the length of the DVI cable. Your custom cable should be long enough to establish the connection. It would help if you didn’t have to pull or stretch the wire. This will only damage the cable.
For best results, decide the cable length you will need. Then place the order for your custom DVI cable.
Quality
You must also want your DVI cable to be durable and of high quality. Nobody wants to compromise on quality! So check if the quality matches your expectations. Carefully inspect the insulation, connector, pins, and other components of the cable.
If you find any quality issues, ask for a refund or place a new order. You can also do a few things to ensure quality-
Go for a reputed cable shop or manufacturer.
Check the products of the company before you order
Read reviews and testimonials of existing customers
Ask for a sample
Now comes the turn to explore the different formats of cable.
Chapter 3: DVI Customization – The Different DVI Formats
You can find different formats of DVI cables in the market. Here’s a breakdown of the formats to help you choose the right one.
For Digital Video: DVI-D
You can use DVI-D cables for connecting video sources to a video output device directly. For example, you can use DVI-D to connect GPU with LCD monitors.
DVI-D cables support higher qualities and offer more speed. This is due to the digital format of the signal.
DVI-D cables eliminate the need for format conversion, and most video cards produce digital signals. But they convert them to analog signals for transmission.
But DVI-D cables can transfer the digital signal to the monitor directly. The monitor then again converts the analog signal to digital.
High-Resolution Analog: DVI-A
You can use a DVI-A cable to connect to a VGA monitor. DVI-A cables transmit analog signals to analog display devices. You can use them for cheap LCD monitors or other analog devices.
DVI-A and VGA cables carry the same analog signal. Like VGA, you may experience some quality loss.
Optimum Functionality: DVI-I
DVI-I cables come in integrated forms. They can transmit digital-to-digital or analog-to-analog signals. For this reason, you can use them in versatile applications. DVI-I is suitable for both analog and digital transmission.
Remember that DVI digital and analog formats are not interchangeable. You can’t use DVI-A for digital devices or DVI-D for analog devices.
You may connect analog to digital, but you need a converter (VGA to DVI-D converter). For connecting digital to analog, you will need a DVI-D to VGA converter.
Now, let’s check out what cables to use for various devices.
Chapter 4: Which DVI Cable do I Need for My Device?
You will need different types of DVI cables for different devices. Here are a few guidelines to choose the right cable.
1. What DVI cable do I need for a 144Hz monitor?
You can use a DVI-D dual link cable for a 144Hz monitor. Dual-link DVI-D supports 144Hz at 1080p.
2. What cable do I need for my CRT monitor?
Your CRT monitor is compatible with only analog signals. So it would help if you had a DVI-A cable.
3. Which cable is suitable for high-resolution gaming?
You can take the help of a dual-link DVI-D cable for intense gaming. It supports a resolution of up to 2560×1600 pixels. DVI-I is also suitable for moderate gaming needs.
4. Which DVI cable do I use for audio signals?
DVI only supports video formats. To transmit audio signals, you have to use a DVI-to-HDMI converter or cable.
5. My graphics card has two connectors. Which DVI cable do I need?
The two connectors on your graphics card may be for analog and digital signals. For the analog connector, use a DVI-A cable. You can use a DVI-D or DVI-I for the digital connector.
6. I have an old HDTV. Which DVI should I use?
First, check whether your HDTV has a DVI or HDMI connector. If it has a DVI connector, you can use a DVI-D cable.
In the next chapter, we will explore single and dual DVI links.
Chapter 5: Single and Dual DVI Links
DVI cables that carry digital signals may come in a single link or dual link. That means you get single and dual links for DVI-D and DVI-I cables. Dual-link cables can support higher resolutions. A single-link DVI cable has 12 pins missing. Dual-link DVI, on the other hand, uses all 24 pins.
So, what is the difference between the two?
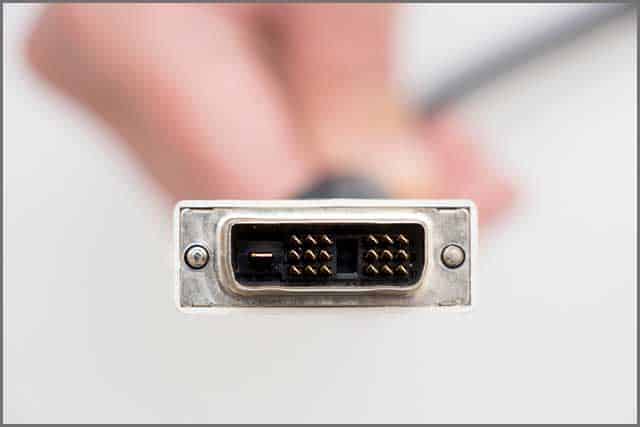
Single Link DVI Cable
DVI cables transmit signals using a format called TMDS (transition minimized differential signaling). Single link DVI takes the help of one TDMS 165MHz transmitter. It can support resolutions of 2.75 megapixels at a 60Hz refresh rate.
On-screen, this translates to a resolution of 2,098 × 1,311 pixels for a 16:10 ratio. For 4:3 ratio, it supports resolutions of 1,915 × 1,436 pixels.
Dual Link DVI Cable
Dual-link DVI supports higher resolutions than single-link DVI. You can enjoy resolutions of 2560×1600 pixels at a 60Hz refresh rate. This is ideal for high-end gaming and high-definition videos. At 120Hz, you can get a resolution of 1920×1200 pixels.
Dual-link DVI cable uses two TDMS 165MHz transmitters instead of one. Each link comes with 3 data channels to carry RGB information. The dual links enable the cable to double the power transmission. You can also take advantage of high speed and strong signal quality.
Now we will show you how to recognize a cable easily.
Chapter 6: How to Identify a DVI Cable?
With so many cables out there, you may find it confusing to identify a DVI cable. That’s why we thought of giving you a few tips. Here’s how you can recognize a cable quickly.
It would help if you looked at the DVI connector as there are two variables.
Many electrical stores sell DVI cables. You can also find them in your local computer and audio/video shops. Before buying, check whether they sell custom DVI cables. You may also be able to place an order for custom cables.
Online Stores
You can browse various online stores that sell custom DVI cables. A simple Google will help you find many online stores.
You should check the reputation of the seller before you place your order. Also, check reviews to ensure the cables are of good quality.
It’s best to go for online stores in your area to enjoy free or low shipping rates.
Custom DVI Cable Manufacturers
If you cannot find your custom cable, you can approach DVI cable manufacturers. They will be able to produce DVI cables matching your design and specifications.
Placing an order with a manufacturer is also suitable if you are ordering large batches. You can also get your cables at much lower prices than in retail stores.
With Cloom Tech, you get the cable you need, with professional customer service you will love. Contact us to know more about how we can help our commercial and B2B customers do more.
Conclusion
By now, you must have learned a lot about DVI cable. You can now pick the right cable for whatever you need to have. We have also told you about other cables to make you fully aware.
If you still haven’t found the right DVI cable, we recommend you contact us. We manufacture the highest quality, custom DVI cables based on your design and requirements.
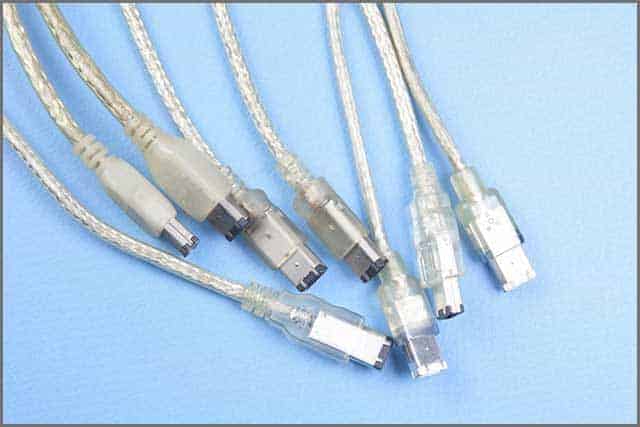
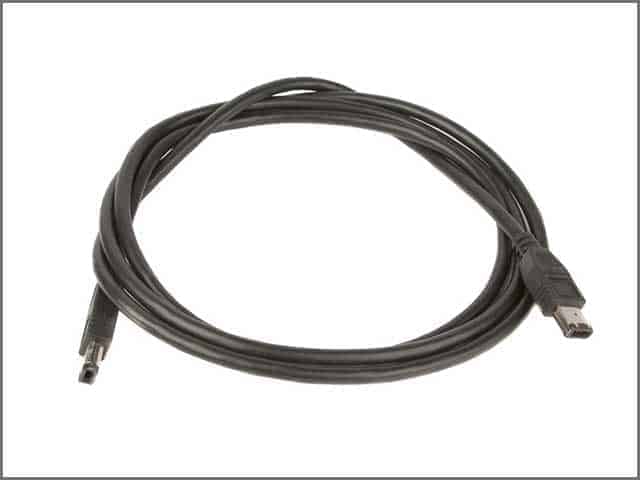
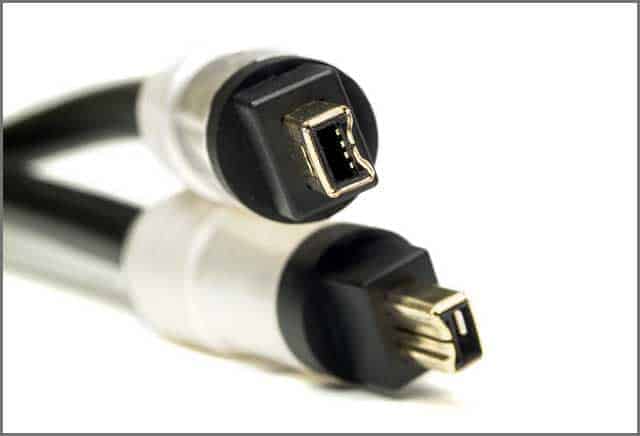
FireWire cable is perhaps the most reliable, versatile high-speed data transfer wiring option. USB cables have become the market leader, but they’re not always the right wiring option for your data transfer needs. You can find FireWire cables in everything from general automobiles to military aircraft.
FireWire cable may seem daunting to a layperson, but don’t fret. They are much more intuitive and easy to understand than you think!
They are a peak-performance data transfer option that can eliminate the need for multiple cables which serve multiple purposes.
This article is your one-stop guide on their applications and importance.
Chapter 1: Why It’s Important To Use Firewire Cables
FireWire cables are a premier option for unparalleled data transfer speeds. They are instrumental when connecting multimedia devices such as video-editing equipment and camcorders. They may carry a higher overall cost ratio than USB 2.0 and USB 3.0, but they make up for it with performance.
FireWire cables also transmit and transfer power while transferring data. This cuts down on the need for multiple wires and the dangers which arise from a wealth of power points.
The cable provides a solution if you’re worried about a complicated wiring pattern for your networking setup.
Using FireWire cables to match peak transfer speed with power supply capability is crucial. There are also plenty of audiovisual devices, television set-top boxes, and other consumer electronics which require FireWire connectivity.
They are important. The versatility and performance of the cable make it a true data transfer wiring superstar.
Chapter 2: What To Use Firewire Cables For
You can use FireWire cables for a host of different data transfer and power needs in various consumer automobiles.
They’re also a massive data transfer and power source for a wealth of cable television boxes. If you have a digital cable, you likely have one attached to your signal box.
These are also the cables used by military personnel for data transfer needs in aircraft and other vehicles. In such a high-stress environment, the high-speed capabilities of cable are an absolute must.
Are you looking to set up an ad-hoc computer network at your job site? FireWire cable provides versatility, data transfer speeds, and power supply to make such a setup possible.
Do you need to connect two computers? The cable is perfect for that too!
There’s also no better data transfer option for pressing audiovisual needs than the FireWire cable. If you need to transfer tons of video from a camcorder to your computer, the FireWire cable can’t be beaten.
There are plenty of other uses for FireWire cable, including charging and syncing older Apple devices. If you want to use the old iPod you just found, you’ll need a custom FireWire cable to get things going.
Chapter 3: How A FireWire Cable Works
FireWire cable uses a specialized copper cable up to 15 feet long in most common implementations. It moves data at 400 Mbps in its basic form. The newest IEEE-1394b advancement, FireWire 800, moves data at twice that speed.
FireWire cables are incredibly versatile when it comes to supporting multiple connector types. It features a six-pin cable to plug into a computer while also sporting a four-pin cable to connect to a peripheral.
This versatility comes in handy when connecting multiple device types on a single network.
One huge advantage of using FireWire cable is its ability to stream real-time data. It can also provide power while doing this.
FireWire cable offers reliable, fast data transfer through high-quality cable and versatile implementations.
Chapter 4: Signs You May Need A FireWire Cable
Is your networking setup overloaded with cables and wires, which present logistical issues? Do you suffer from lagging data transfer speeds, especially when providing power to a peripheral from an external source?
FireWire cable is a fantastic solution for complex wiring problems because it is versatile. While newer devices may need a FireWire cable adapter, it’s worth it if you’re looking for consistent, high data transfer speeds.
Are you transferring a bunch of different videos from a professional camcorder? Are you always sharing multimedia across your networking setup, professional or otherwise?
There is no match for FireWire cable to efficiently and effectively transfer multimedia files at high speeds.
Chapter 5: How Custom FireWire Cables Can Benefit You
Custom FireWire cables are the perfect solution for networking problems where there is no stock solution. They can help provide peak networking capabilities for a cache of devices and computers, both new and old.
Custom FireWire cables will cut your cord usage significantly while providing a simple data transfer option that’s blazing fast.
If you’re struggling with lag or unnecessarily long download times, get a custom FireWire cable designed for unparalleled speed and efficiency.
Chapter 6: What To Look For In A Cable Company
A FireWire cable company needs to be well-versed in your particular areas of need. They must have an innate understanding of wiring problems and solutions.
They should have years of experience setting up FireWire cables and the interfaces which utilize them. If you have questions on the whats and whys of cable, your cable company must have the answers.
The best cable companies have a game plan. If you’re struggling with lagging data transfer speeds, the right cable provider will demonstrate how they can help.
It’s all about simplicity. A top FireWire cable company combines technological knowledge to explain it in terms of relevance to a consumer.
Don’t settle for a FireWire cable company that pushes you to pay for a job without transparency. You deserve expert advice, installers, and technicians who anticipate problems instead of reacting.
Chapter 7: Where To Buy A Custom Cable
You can’t go to a retail store to buy a custom FireWire cable. You’ll need to enlist the help of a wiring company that provides data transfer solutions.
While you’ll be able to find stock FireWire cables online, they may not connect all the devices you need connecting.
A wiring company can build a custom firewire cable that eliminates the need for stock wires. During your consultation, they will listen to your needs and custom-craft the right FireWire cables.
There are a host of custom wiring services out there with varied reputations. Don’t settle for a second-rate wiring company that promises cheap rates instead of an excellent product!
With the help of a top-rated wiring company like Cloom Tech, you can get the right custom cable the first time!
Cloom Tech is your one-stop shop for intuitive wire harness and cable assembly solutions. Wiringo’s experienced technical team has made thousands upon thousands of custom cables for customers around the globe.
There isn’t a custom cable company out there that boasts the track record and customer satisfaction ratings of Cloom Tech.
Chapter 8: The General Cost
Customization of FireWire cables will save you money in the long run. While you’ll pay for materials and labor, the right custom FireWire cable is well worth it.
Imagine the money you’d spend on multiple wires that a single cable can replace. Besides, a custom FireWire cable is made for your current and future needs for whatever you need to use it for.
So it will replace unneeded wires now, and paying for a custom cable will limit future costs.
There are a lot of custom wiring services out there that can build a FireWire cable for you. However, there’s a varied cost breakdown for each.
With the glut of options out there, it can be very confusing which custom FireWire company to choose.
Well, there is one custom wiring service that can promise you the perfect balance of quality craftsmanship and no hidden fees – Cloom Tech.
Conclusion
Look no further if you require custom FireWire cables or multiple FireWire cables for your data transfer needs. Cloom Tech has made many custom FireWire cables for customers like you.
The custom FireWire cables they’ve provided to customers have provided networking solutions for even the most unique situations.
The right cable can turn a logistic networking mess into an organized, efficient system. The custom FireWire cable you purchase from Cloom Tech will help you get the most out of your network.
Let the experienced staff at Cloom Tech work with you to meet and exceed your data transfer needs.
Since day one, we have been using computers for a long time, and VGA cables and VGA connectors have been part of our electronics and computers. VGA stands for Video Graphic Array, and there are many ways to connect the video sources to monitor and display devices like LCD.
If you are looking for commercial VGA cable manufacturing or want to buy bulk products for your business, you must know the basics of VGA cables.
We will discuss every aspect of VGA cables for commercial and industrial use. After reading this guide, you can decide the best manufacturing option for your business.
Chapter 1: What is a VGA Cable?
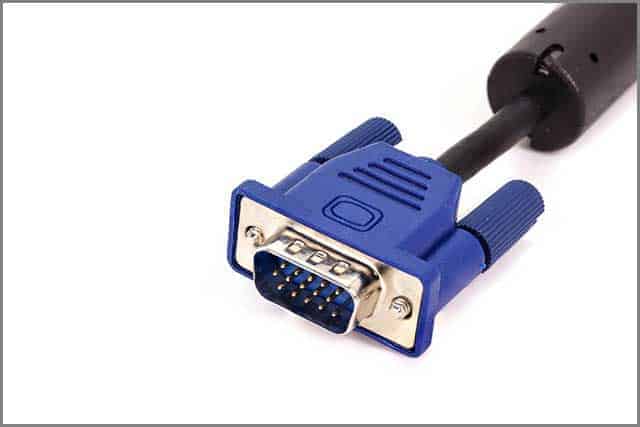
The standard VGA cable connects the video source to other displaying devices. You might have seen a blue-colored cable that connects the CPU to the LED.
This cable is the VGA connector that has three rows of 15 pins. VGA cables are the oldest connection method; even in 2019, we can see these connectors in many devices and industries.
Mostly the computing sector uses VGA cables in display devices.
Although the style and numbers of the pins have changed, the main working and model of VGA cables are still the same.
If you decide to buy a new bulk order of VGA cables for your industry or business, please get in touch with CLOOM Tech. At CLOOM Tech, we can design custom-made VGA cables for your business and devices.
CLOOM Tech is the industry leader in manufacturing customized cable harnesses and VGA cables.
Due to the increasing demand for VGA cable manufacturing in the computing sector, we provide all kinds of cable assembly, cable harnesses, and other electrical services for small and multinational businesses.
We have decided to write a detailed post about the VGA cables and everything you need to know about these cables.
History of VGA Cables
VGA cables are not always the same in terms of size. The traditional 15-pin VGA cables are used for general desktop computers, which is inappropriate for laptops and other mini devices.
Mini-VGA cables are used for small devices like the latest desktop PCs and laptops.
Still, in 2019, you cannot deny the importance of VGA cables in electronics. The latest technologies and cables like HDMI and DVI replace traditional VGA cables.
Most devices have replaced these traditional VGA cables. But you will need these cables if your system has some display devices as components.
Which Devices use VGA Cables?
Suppose you think that only computers use VGA cables. Several other devices use VGA cables to connect display sources and display devices.
Here are some devices we see daily in our surroundings that use VGA cables. In these devices, you can see the use of mini VGA cables and traditional normal-sized VGA cables.
Laptops
TV Screens
LED Displays
Video Cards
Video Devices
Chapter 2: How to Choose the Suitable VGA Cable?
There are many VGA cables, but there are no universal for. The choice of VGA cable depends upon your requirements and the design of your device.
If you have a normal-sized computer, you need a different VGA cable. And if you are into laptop manufacturing, you will need a mini VGA cable.
If you feel that this VGA cable choice is not an easy task for you, let us help you make the right choice for you. You can contact CLOOM Tech to manufacture VGA cables for your device and electronics.
Choosing a suitable VGA cable is not rocket science if you know the basics of VGA cables. First, you must decide the type of device you want cables for.
If that device is already available in the market, you can easily buy VGA cables from the market or contact CLOOM Tech for bulk orders.
But if you are designing a new device for your business or client, you may not find a suitable VGA cable.
You can consult with experts at CLOOM Tech for custom-made VGA cables. We have already worked with many top brands and developed customized wiring harnesses and assembly cables for several industries.
Things to look for in a VGA Cable
If you are making the first purchase of VGA cables for your electronics, you must have a checklist to check before making the payment. Here are some essential things that you need to consider:
· Quality of the VGA Cable
The quality and material used in manufacturing the VGA cables are paramount. The quality of the connectors and the VGA cables are also essential for the device’s safety.
You should never compromise on the cable quality if something goes wrong with the VGA cables; the whole device and the system can fail.
Although most of the VGA cables are not part of the device’s internal circuits yet, if something goes wrong with VGA cables, you will lose the display.
There are no universal or international standards to define the exact quality of the VGA cables.
But in general, high-quality VGA cables use coaxial cables of high material, and the external coating is there for extra protection.
The protective coating of inexpensive cables makes the cables thicker and protects the wires from damage and cuts.
· Design of the VGA Cable
The design means what kind of VGA cables you are looking for. If you are looking for traditional VGA cables for your electronics, you can quickly get the cables from any quality manufacturer like CLOOM Tech.
But if you are looking for unique wires with exceptional pins, you need to consult your design with the experts. So they can design custom VGA cables for your electronics.
While buying VGA connectors, you must see that the design follows the safety standards and that the wires fulfill the quality standards.
The internal design of VGA cables can vary depending on the size. The quality cables are generally thicker in size due to the protective layer of insulation.
At CLOOM Tech, our R&D team always works on making the design according to the latest electronic demands and standards.
We pay attention to the design of the VGA cables, and the quality is also important to our team.
Price of average VGA Cable
The cables’ cost depends upon the cord’s length and quality. If you look for top VGA cables on Amazon, you will see that regular VGA cables range from $7 to $15.
The price can vary if you want to buy lengthy wire for a specific purpose.
If you want a customized VGA cable for your business or electronics, you can consult our CLOOM Tech team to get a quote.
We provide the best quality wiring harnesses and cable assembly at a reasonable price for industries and businesses.
The price of the VGA cable can vary from brand to brand. We have analyzed this price from top online stores.
Chapter 3: VGA Cable for business-Levell Use
Many businesses and services require bulk VGA cables for professional use. Just imagine that you are setting up a new office in a new location.
You will probably need hundreds of VGA cables for your monitors, LED screens, and other devices. Buying these cables from any typical store will cost you a fortune.
VGA Cable Business
Due to the increasing demand for these connectors and cables, you can choose the business of VGA cable selling. You can set up an online or physical store in your local town.
If you want to place a bulk order for VGA cables, you can contact us at CLOOM Tech. We will deliver the most advanced cable assembly in the market.
How to get customized VGA Cables?
CLOOM Tech is one of the top brands for cable assembly, wiring harnesses, and automobile wiring. Generally, usual stores and sites don’t offer customized VGA cable manufacturing.
You have to contact a manufacturer that can design custom wires and cables for your devices. But before making the final deal, don’t forget to do a quality check on the company you choose for your transaction.
You can see testimonials of our top clients on several review sites, and you will find us the top pick of all businesses.
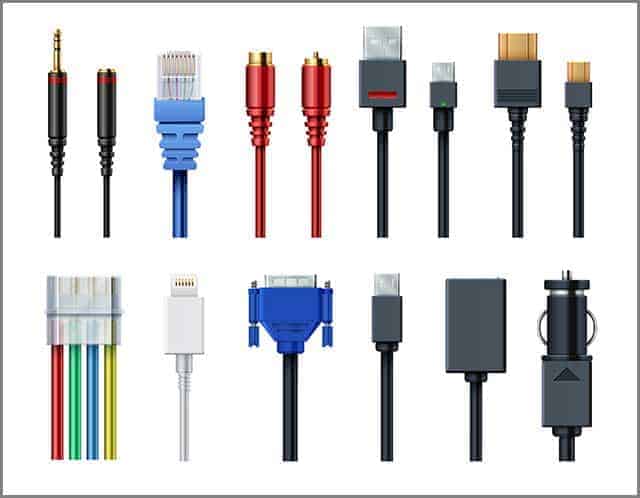
Many types of computer cables connect the different components of the computer with each other. Here are some of the most important types of computer cables that you must know.
You will see that many devices use these cables in different styles and designs. Some cables transfer data from one component to another, and some transfer energy from the source to the components.
VGA cables
DVI cables
HDMI cables
Ethernet cables
USB cables
Power cords
Display ports
Chapter 4: Where to buy VGA Cables?
Buying a quality VGA cable is not a hard task, as these are readily available in the market. Can buy VGA cables from any physical hardware store, and you can also purchase these cables from any online store.
You can find VGA cables for different purposes on Amazon, eBay, and any other online store.
You can contact any wholesale dealer or us at CLOOM Tech if you want bulk cables. We will provide the best quality VGA cables at the most reasonable price in the market.
If you are not sure about your requirements, you can consult us for your needs. Our expert professionals will guide you on each step, and we always put your business as our priority at CLOOM Tech.
Chapter 5: Where to get Customized VGA Cables?
At CLOOM Tech.Ltd, We deal in all VGA cables and wiring harnesses, including power cables, signal cables, automobile harnessing cables, and heavy-duty industries.
Our team and R&D department are always adopting new trends and technologies, so our customers always get the best solutions for their VGA cable needs.
If you are looking for an experienced team to develop VGA cables for your project, get in touch with our team. We will analyze the project to offer the best solution for your projects.
Conclusion
VGA cables by CLOOM Tech not only deliver the best results, but our technology is always focused on providing futuristic results for your electronic needs. In this article, we have covered almost everything that you should know about VGA cables.
If you have any queries, please get in touch with our CLOOM Tech team, and we will be more than happy to assist you.
CLOOM Tech offers wiring harness and cable assembly services for all sectors of industries. Our team of experts is always focused on delivering customized solutions for wiring harnesses, cable assembly, and custom electronic designs.
Do you have a custom design for your electronic system and want customized wiring solutions for your project? CLOOM Tech provides fully customized integrated design solutions from scratch.
Does your trailer have the right wiring system? With time, the wiring system in your trailer may need a relook. Are you worried? Don’t be. It’s time to design your trailer wiring harness that will fit your trailer and your vehicle.
With the right guide and a little help, you can ensure that it’s simple to wire your trailer the right way.
In this guide, you will learn about the common wiring systems, the different ways to wire your vehicle for towing, and the methods to convert different wiring systems. You will also learn how to rewire your trailer using a wiring harness.
Chapter 1: Types of Trailer Wiring Systems
People attach all kinds of trailers to their vehicles. You can attach a boat trailer or tow a trailer to your car to tow on the road.
To use the trailers on the road, you have to make sure they abide by laws and regulations. One such law is having working lights and turn signals that sync with your vehicle.
You have working tail lights, brake lights, and turn signals. You also need them to make way for safe towing and alert other drivers on the road.
Before you wire your trailer, you need to know your vehicle’s wiring system. We will discuss some common vehicle wiring systems used by cars and automobiles.
Two-Wire System
Two-wire systems are the most basic type of wiring in vehicles and trailers. The system uses one wire to transmit the stop or brake signals.
The taillight signal flows through another wire. You can find two-wire systems only in some vehicles right now.
Three-Wire System
As the name suggests, three-wire systems come with three wires. It uses three cables to transmit the stop, turn, and tail signals.
You will mostly need a converter to connect three-wire systems to your trailer. It’s also the most common system used in the automobile industry.
Pulse Width Modulation (PWM) System
Pulse Width Modulation (PWM) System is also a multiplex system. The system uses a single wire to send stop, turn, and taillight signals.
It does so by using signals of varying intensity. Most of the current vehicles use this wiring technology.
You can use LED with PWM systems which fall into two categories-
ST systems: ST system refers to the stop and tail system. It takes the help of a single wire to transmit taillight and stop signals. You have separate wires to send the turn signals.
You may need an ST converter to connect the vehicle wiring to the trailer wiring. STT systems:
STT system refers to stop, turn, and taillight signals. The system uses a single wire to control all three- stop, turn, and tail signals.
You will generally need an STT converter to hook your vehicle wiring to trailer wiring.
Now, we will show you how to prepare your vehicle for towing.
Chapter 2: Trailer Wiring Harness—How to Wire Your Vehicle for Towing
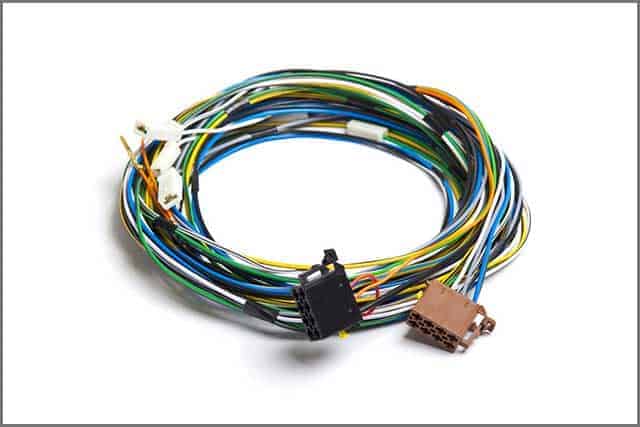
You will need something to connect your vehicle wiring to the trailer wiring. Some vehicles come with a built-in connector to facilitate connection. Custom wiring is the ideal answer if your car doesn’t have a connector.
You can customize custom harnesses to match the wiring of your vehicle. A custom trailer wiring harness is also known as T-connector. It provides a socket to connect to the trailer, commonly using a 4-way flat.
You can use two types of custom wiring for connecting your vehicle wiring to the trailer-
Custom wiring harness
Custom wiring connectors
Both may seem identical look-wise, but they differ entirely in function.
Trailer Wiring Harness–Custom Wiring Harness
A custom wiring harness comes with several plugs. The plugs can connect directly to the taillight assembly of the vehicle.
The harness sources its power from a battery or the taillights. Using a custom wiring harness, you will need two connection points to set up a connection. You don’t generally need any splicing or soldering.
Custom Wiring Connectors
Not all vehicles have a connector to hook up trailer wiring. They may come with a special socket provided by the manufacturer.
The socket helps you to connect your vehicle wiring to trailer wiring. The system uses a single plug to connect to the factory-made socket of the vehicle. It helps you set up the connection using standard trailer wiring connectors.
Check out whether your vehicle has a socket for connecting trailer wiring. Then decide if you need a custom wiring harness or a custom wiring connector.
In the next section, we will explore the ways to convert two different wiring systems.
Chapter 3: How to Convert Two Different Wiring Systems
You may not always get a custom wiring harness for your trailer. In that case, you will need an electrical converter.
An electric converter helps you connect your vehicle’s wiring to the trailer. It provides a way to hook up complex vehicle wiring with simple trailer wiring.
For instance, most cars use the three-wire or PWM system. On the other hand, trailers generally use two-wire setups.
Now, the two configurations do not match. Here, an electric converter comes in handy. It allows you to connect the vehicle and trailer through a regular plug and socket.
You can try searching your local automobile spare parts shop for electric converters. Else, you can also search online.
Now comes the turn to find out the differences between plugs and sockets.
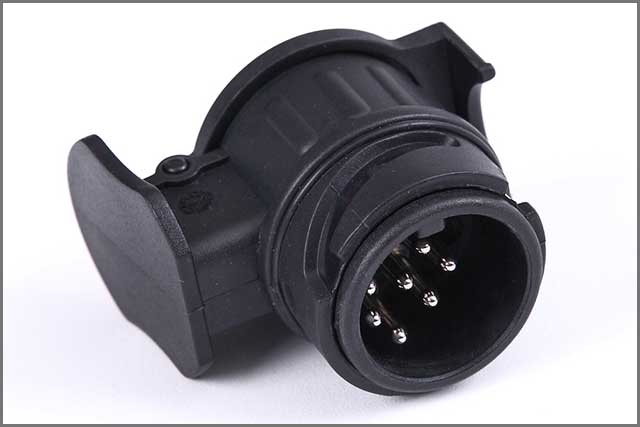
Chapter 4: Trailer Wiring Harness—Differences Between Plugs & Sockets
Plugs and sockets help you connect your vehicle’s wiring to the trailer. Socket refers to the connection that resides with the car.
Plug refers to the connection of the trailer side. You may find plugs and sockets with two to seven wires. The electrical requirements of the trailer determine the number of wires you need.
Most plugs and sockets have color-coded wires to facilitate easy connection.
Trailer Wiring Harness–Common Plug Ends by Trailer Type
Trailers come with different types of plugs. The electrical components of the trailer determine the type of plug. Here is a list of different trailers and the plugs they use-
Boat trailer without surge breaks: 4-way flat plugs are the most common. You may also find 7-way RV blade plugs in some cases.
Boat trailer with surge breaks: Commonly uses 5-way flat plugs. They may also use 6-way round or 7-way RV blade plugs on rare occasions.
Utility trailers:
4-way flat plugs are the most common. Sometimes they also use 6-way round or 7-way RV blade plugs.
Camper trailers:
Camper trailers generally have 7-way RV blade plugs. At times they may also use 6-way round or 7-way round plugs.
5th wheel trailers:
Uses 7-way RV blade plugs. Few of them may have 6-way round plugs.
Gooseneck trailers:
6-way round plugs are the most common. Rarely do they use 7-way RV blade plugs.
In the next part, we will learn how to adapt to two different connector types.
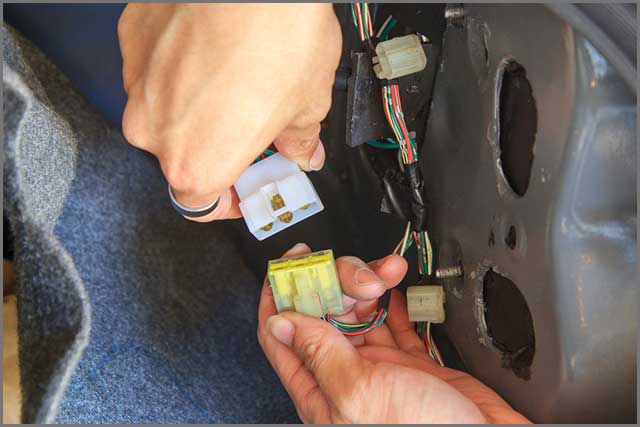
Chapter 5: How to Adapt Two Different Connector Types
You will find countless types of connectors in vehicles. For instance, your vehicle may have 6-way round connectors while the trailer uses a 4-way flat.
That means your trailer connector may differ from that of your car. How do you establish a connection in such cases?
The answer lies in using a simple adapter.
An adapter is a simple electrical device. You can connect your vehicle wiring to trailer wiring in case of different plugs and sockets.
Adapters don’t need any extra work to establish the connection. They act as a bridge between two different connector types.
In rare cases, you may need extra wires to ground the system. You may also need wires to splice into your current vehicle wiring. Some common types of adapters include-
4-way flat to 6-way round adapter
4-way round to 4-way flat adapter
7-way RV blade to 6-way round adapter
7-way RV blade to 6-way round adapter
6-way round to 4-way flat adapter
Now we will tell you how to rewire your trailer to make it road-ready.
Chapter 6: How to Rewire Your Trailer
Rewiring your trailer is not a difficult task. You will only need a few tools and some of your time to do the job. The main thing to arrange is your trailer wiring harness. Tools You Will Need
Trailer wiring harness
2. Pliers
3. Wire brush
4. Clips
Follow the steps mentioned below to rewire your trailer. If you are not confident enough, you can also go to a professional for the task.
Set Up Your Trailer
Step 1: Trailer Wiring Harness—Take Out Old Wiring
Remove the old wiring of the trailer using a set of pliers. Also, remove the trailer wire connector if present. Keep the wiring layout in mind to assist you in rewiring the trailer.
Step 2: Clean the Area
Use a wire brush to clean any corroded material from the space of the old harness. You can also spray the area with anti-rust paint to check corrosion.
Step 3: Trailer Wiring Harness—Re-Route the New Wiring
Now place the new harness through the frame to reach the back of the trailer. Try to route the wire along the frame rail of the trailer. You can use rubber grommets to secure the harness.
Step 4: Connect the Ground Wire
Check if your trailer wiring harness comes with an attached plug. It would help if you connected the white ground wire to the trailer connector. Then you don’t need to do any wiring at the coupler.
Leave enough wire at the connector to reach the trailer plug. Also, allow enough slack in the wire to accommodate the turning radius of the trailer.
Installing the Lights
Step 1: Trailer Wiring Harness—Mount the Marker Lights
Use the bolts to install the marker lights. Then use snap locks to splice the wires of the marker lights.
Step 2: Trailer Wiring Harness—Secure Wires to the Frame
Use the clips from the wiring kit to secure the wiring to the frame. Protect the harness by the trailer frame to keep it safe from contaminants and movable parts.
Step 3: Trailer Wiring Harness—Mount the Taillights
Now attach the taillights to the frame of the trailer. Then connect the wires to respective connection points.
Test Your Connection
It’s always better to test your trailer lights before you hit the road. Also, ensure that the lights sync with your vehicle’s lights.
Pro tip: Most electrical issues arise from problematic ground connections. It may result in lighting issues even when your voltmeter displays the available charge. For best results, use the manufacturer-provided factory ground connection. Else, connect the ground wire to the chassis using a bolt.
The next section will tell you where you can get a custom trailer wiring harness.
Chapter 7: Where to Buy Custom Trailer Wiring Harness?
Custom wiring trailer harnesses may be available from multiple sources. Here are some of the avenues you can try to buy your custom harness.
You can check out your local automobile spare shop for a custom harness. They may have a harness in stock that suits your vehicle’s needs.
Be sure to note the specifications of your vehicle and trailer wiring. That will help you select the right harness for your car and trailer.
Online Stores
Many online electrical stores deal in automobile harnesses. You can search the internet and browse various online stores to locate your harness.
Make sure to determine the reliability of the seller before placing your order. Also, look for fair return policies. You may need to return the harness if it doesn’t match your requirements.
Cloom Tech Supply Custom Trailer Wiring Harness
You can also contact us to create your custom trailer wiring harness. We make custom harnesses that match the specifications of your vehicle and trailer.
We adopt strict quality control procedures and meet all professional standards. Have you covered if you are looking for harnesses tailored to your needs!
Trailer Wiring Harness–Conclusion
Trailer wiring harnesses are crucial if you want to tow a trailer. It helps you connect your vehicle wiring to trailer wiring. Without a harness, your trailer lights and turn signals won’t work.
You can respect the law and avoid getting tickets using a harness. You can contact us for high-quality custom trailer wiring harnesses.
We manufacture custom harnesses with high standards matching your exact specifications.
Are you tired of making the wrong choice of ribbon cables? Do you know the difference between a ribbon cable and a flexible flat cable?
It comes in various sizes and is necessary for different applications. Often, these cables appear quite confusing to individuals who find it difficult to spot their differences.
Not to worry, it is not as difficult as it seems. The information you crave is available at your disposal. Read on!
Chapter 1: Understanding a Ribbon Cable
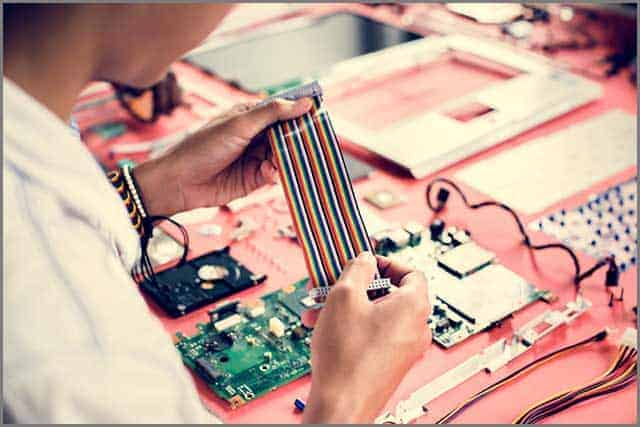
There is much discrete cable that you could use for a project and still get the desired out. However, one basic need for flat ribbon cable assembly is space. The use of flat ribbon cable assembly in the internal wiring of electronics devices conserves space. This cable assembly can transmit both power and data from point to point in the computer. It is necessary to stress that flat ribbon cable assembly is not limited to computing devices only.
What is a ribbon cable?
Another name for ribbon cable is multi-wire planar cable or hippie cable. It is a cable type with many conducting wires running parallel on the same flat plane.
The ribbon cable is flat and rectangular. The flexibility of the ribbon cable makes it easy to hold many connectors simultaneously and transmit a large amount of data through signals. Furthermore, ribbon cables help to manage conductors effectively, even where space is limited.
A typical instance that proves the usefulness of ribbon cable is its function in computer hardware. The ribbon cable connects the disk drive to the disk drive controller.
These cable types are specialized cables that connect IDE surfaces to IDE connectors.
Ribbon cable color coding
The essence of ribbon cable color coding is to prevent the occurrence of reverse connections. One rule for ribbon cable color coding is that the edge of the cable, which bears a red stripe, connects to pin 1 of the connector. The cable color-coding makes it easy to identify the different sets of connectors.
More importantly, it helps make the installation easier because it can easily identify the different conductors important to the connection.
Ribbon cable size
A pertinent question that engulfs individuals’ minds is the exact size of the ribbon cable that suits their needs. There are two ways of identifying ribbon cable sizes. The two factors considered are:
• The pitch or spacing of conductors
• The number of conductors or ways.
For the conductors’ pitch or spacing, a spacing of 0.05 inch (1.27 mm) is the most common form of ribbon cable spacing. This spacing type allows for a two-row connector with a pin spacing of 0.1 inches (2.54mm). Most personal computers favor this exact spacing ribbon cable size. It is a common type of ribbon cable size in floppy disk drive cables and custom parallel ATA cables.
Other types of ribbon cable connectors’ sizes are 4, 6, 8, 9, 10, 14, 15, 16, 18, 20, 24, 25, 26, 34, 37, 40, 50, 60, 64, and 80.
Ribbon cables are unarguably handy and play significant functions in printers and computers.
Benefits of the Ribbon Cable Assembly
Ribbon cables are flat and flexible, and these features afford them the ability to fit comfortably well in any compartment.
Also, the fact that ribbon cables are lightweight contributes very little to the device’s overall weight, and it explains why you see so many connectors in a computer but weigh less.
Another benefit is the reduction in overheating of devices. They can fold in a compartment and make more space, and these rooms are channels through which air can flow. Therefore, the device is less prone to failure due to overheating.
With a flat ribbon cable assembly, you can easily adjust the cables to suit the device’s connections. Also, it comes with its hand press for insulation piercings during adjustment. Rbbon cable assembly also comes color-coding to prevent reverse connection. In the absence of this, a reverse connection can damage the device.
Furthermore, the ribbon cable assembly is a good conductor. They possess good electrical qualities, and these qualities make them able to carry a larger current capacity.
Lastly, using ribbon cables eliminates the stress associated with troubleshooting bulk wires. They are organized already in a single piece.
IDC Ribbon Cable
Insulation-displacement contact (IDC) has another name to be Insulation-piercing contact (IPC). This process involves the forcefully inserting of a selectively sharpened blade or blades through the insulation. In this case, there is no need to strip the conductor bare before connection.
Application of Ribbon Cable
Ribbon cables are almost indispensable in manufacturing industries. They play a significant role in the consumer electronics manufacturing industry.
Additionally, ribbon cables are essential in building many electrical products. A good number of electrical products make use of ribbon cables. It is because of the miniature nature of ribbon cables, which makes them easy to use for designing electrical products.
Quite a several manufacturers rely on Flat flexible cable(FFC) to build laptops and mobile phones.
More so, ribbon cables are important for military-based equipment construction. They are also important in industrial environments.
These cables are necessary for the automotive industry. In constructing automobiles, manufacturers make use of ribbon cables.
Industries like aviation industries and space exploration find the ribbon cables essential in carrying out their activities.
Chapter 2: Ribbon Cable Types
Ribbon cables, like other cables, have different types. Hence, we shall consider the five types of ribbon cables, which include:
Rainbow Ribbon Cable
Rainbow ribbon cables are similar to the standard ribbon cables available. But this time, the wires have, by default, rainbow coloring. The rainbow coloring helps with easy identification and organization. Also, similar to the resistor color doing, where Brown can depict pin 1. It works as with the red stripe on one edge of a standard ribbon cable
Twisted Flat Ribbon Cable
The twisted flat ribbon cable is different from the standard ribbon cable. In contrast, they have two pairs of their conductor twisted and bonded. One benefit of twisted flat ribbon cables is that it reduces cross talk.
Standard Ribbon Cable
The standard ribbon cable comes with the ease of mass termination. A typical way to know one is by its color – They are grey.
Round to Flat Ribbon Cable
This unique type of ribbons cable combines mass termination ability with the ease of discrete wire cable. The conductors are folded into a circular frame and are split apart at the other end, and it allows them to ease access to use. Generally, this type of ribbon cable is suitable for areas with tight space.
Bonded Ribbon Cable
Bonded ribbon cables are organized and do not seem scattered about the place. However, it is also less flexible than other types, making its application difficult in tight spaces. One exciting advantage of this cable is that it provides straightforward mass termination with a range of cabling products. In addition, Bonded ribbon cables are of 3 types: Single Hook-Up wire, Coaxial cable, and Multi-Conductor cable.
Folded ribbon cable
Folded flat ribbon cable assemblies are the best when it comes to limited areas. Depending on the nature of a project, folded cable assemblies afford the needed flexibility for installation. You can fold them in the desired directions; however, you would require some arrangement tools for permanent folding.
Chapter 3: Ribbon Cable Connectors
There are quite a handful of ribbon cable connectors that are available with IDC termination. They are:
BT 224 connector
Another name for BT 224 connector is the IDC connector. Many standards define this connector type, such as BS 9525- F0023, DIN 41651, and MIL-C- 83505.
• BT 224 connectors mate with a purpose-made plug or two-row gird of header pins with 0.1 inches 2.44mm spacing.
• They are compatible with ATA cables.
D- Subminiature connector
These connectors are not as common as the crimp and solder bucket types.
• D- Subminiature connectors are suitable for serial ports and printer ports. It means that these connectors work perfectly for both printers and serial ports.
DIN 41612 connector
It is a connector type that is very common among different suppliers that operate together. Although the standard is now in an internationally standard form of IEC 60603-2 and EN 60603-2
• The DIN 41612 connector suits the Euro card bus, NU bus, Futurebus, VMEbus, Multibus 11, and Tram motherboards.
• All of the applications of DIN 41612 use a male Eurocard bus in a female DIN 41612 on a backplane.
PCB transition headers
PCB represents the Printed circuit board. It is a connector type with two rolls of pins with the same spacing as BT 224 connectors. For efficiency, these pins connect directly to the PCB.
This connector possesses high low contact resistance and long life. It also offers a cost-effective means of connecting PCB to other applications.
• It connects the wire to the board.
• It is also effective for separable header/sockets
• Suitable for dual-in-line application
Micro Ribbon connector
There are a host of names for the ribbon connectors. These names are a telco, 25 pair, miniature delta ribbon, mini D ribbon, MDR, Amphenol, or even miniature ribbon connector.
Microribbon connector possesses a shape similar to D- Subminiature connector with two parallel rows of contact. Its contacts are not pins. Rather, they are small bands of metal in the form of ribbons.
The female connectors of the micro ribbon connector possess a bail lock that connects them to the male counterpart for a secure connection.
• The micro ribbon connectors are a suitable fit for telecommunication equipment.
• It is also important for computers with a lot of contacts.
DIL Headers
What are DIL headers?
The DIL headers possess pins with the same spacing as standard DIL ICs. They connect two Printed circuit Boards. Also, they work well with appropriate DIL sockets to form a plug and even socket pair.
• These connectors work well within replacing an IC in connection to an external device.
• It is also suitable as a PCB transition header on stripboards.
https://www.youtube.com/watch?v=EFyFhcmeS2I
Chapter 4: Ribbon Cable vs FFC (Flexible Flat Cable)
Are there indeed differences between Ribbon Cable and FFC? Yes!
What are flexible flat cables?
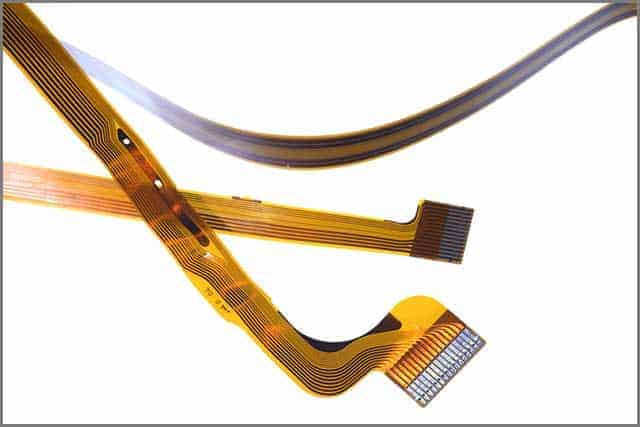
Flexible flat cables are a type of ribbon cable that is flat and flexible. These are direct connections without any additional components. It is a thin flat cable commonly found in high-density electronics applications. Its material is very flexible.
These cables possess a special sort of makeup. Its makeup is a flat and flexible plastic film base and multiple conductors on a surface.
FFC (Flexible Flat Cable) vs FPC(Flexible Printed Circuit)
Flat flexible cables (FFC), as we have discussed, are ribbon cables used mostly in high-density devices like computers. Their flat and flexible nature allows them to connect two components freely in a limited space.
However, FPC stands for Flexible Printed Circuit. Like FFC, it is flexible, having a conductive circuit sandwiched in between elastic polymers. Technically, FPC is more than just a cable; and it is more of a flexible printed circuit board. However, it is thinner, lighter, and less rigid compared to the traditional PCBs.
Application
Flexible flat cables are important for easy cable management in high-flex environments.
It is a suitable cable for printers, scanners, copiers, fax machines, DVD stereos, LCD appliances, and other electrical products.
It is common in modern equipment to assist the printer connection between the head and the motherboard.
The FFC plays a considerable role in signal transmission and plate board connections.
FFC Specification
Pitch: Examples of pitches are 1.00 mm, 1.25 mm, 1.27 mm, and more.
Types: FFCs are Type 1/Type A and Type 2, or Type D. The difference here is that type A cables have contacts on one side and at both ends, and in contrast, Type D has connections on both sides and at both ends of the line.
Conductors Size: You can determine the size by measuring its width and thickness
Exposure Length: FFC cables gave their exposure length, and you can check for it at the end of the cable.
Stiffener: An extra layer of material at the opposite side of the cable’s exposed length helps ZIF or LIF connections.
Benefits of Flexible Flat Cable
The wires of a flexible flat cable are not wound like a round cable. They are lighter and more flexible. It makes it easy to protect the individual wires.
They do not occupy too many spaces like round cables
It offers a more sophisticated EMI/ RFI suspension. As such, it eliminates wire coupling issues.
The ends of flexible flat cables are thick.
Ribbon cable VS FFC: Difference
Both cable types are important in diverse ways. While one assist in a particular field, the other remains relevant in a field that suits it. However, flat cables existed long before the ribbon cables came into existence.
Ribbon cables are efficient in various areas like computing, aerospace, military, and robotics. These cables possess good superior quality, flexibility, and packaging efficiency and reduce the presence of electronic noise.
Despite these numerous advantages, the ribbon cables handle termination techniques rather poorly.
More so, there are also problematic cases of frictional heat in the cable during its repetitive motion cycles — also, conductors inside the cable move relative to one another.
The flexible flat cables don’t move within the jacket to retain their electrical properties and qualities. Another interesting feature of the flexible flat cable is that the cable’s conductors have similar physical and electrical lengths.
In flexible flat cables, the conductors are isolated to keep them stable. These cables are more flexible than ribbon cables.
Therefore, it is necessary to understand the capabilities of both the ribbon cable and flexible flat cables to ensure proper usage. In all, flexible flat cables possess better features than ribbon cables.
An image of a technician holding the flexible flat cable in a workshop
Chapter 5: How to Choose Ribbon Cable
Asides from recognizing ribbon cables, the confusion lies in choosing them. In choosing ribbon cables, there are quite a several factors to put into consideration. These cables are:
Pitch
Pitch is spacing. It refers to the spacing of conductors within the ribbon cable. The pitch depends on the cable requirements and specifications. Some examples of pitches include 0.5mm, 1mm, 1.25mm, and 2mm.
Ribbon cable pitch VS connector pitch
The ribbon cable pitch of the connector and that of a ribbon cable is never the same. The ribbon cable is always half of the connector pitch.
By this implication, the ribbon cable pitch is usually half of the connector’s pitch when there is a two-row connector pitch.
Another way of determining the pitch of the ribbon cable is by measuring the outside edge of the cable and then dividing the figure by the total number of connectors.
Extreme temperatures
Ribbon cables tolerate all sorts of temperatures, be they harsh or friendly. But, if ribbon cables operate perfectly in unfavorable temperatures, a silicon jacket is the best bet.
Flexibility
In choosing ribbon cables, flexibility is a necessary factor. Since ribbon cables are flexible, there is still a need to purchase a more flexible type. If the design is limited or requires a more flexible type, purchase a custom ribbon cable with greater flexibility that suits the job.
Long life
Consider the life span of the ribbon cable you intend to purchase. Like every other electrical component, choosing a ribbon cable that can survive the test of time is necessary.
Choose a ribbon cable that is adequately proven by professionals and assured of a long life cycle.
Fire resistant
Fire resistance is another factor to consider when choosing a ribbon cable. The importance is not only for the benefits of the electrical equipment but also for safety.
Make it a duty to settle for a ribbon cable type in line with the EU’s Restriction of Hazardous Substances Directives and fit according to fire safety standards.
Chapter 6: Cloom Tech Custom Ribbon Cable Service
Cloom Tech is not just a body of professional teams specialized in different areas of expertise. With us, you are guaranteed a superb custom ribbon cable service, as it is a part of what we are known to do well; we are a team of seasoned professionals who take a keen interest in delivering effective results.
Shielded Ribbon Cable Assemblies:
As we stated earlier, shielded ribbon cables are the best fit for tight spaces. More so, they have numerous applications in computers and computer peripherals. Floppy drivers, hard drives, and CD drives use shield ribbon cables. Also, printers and some computer devices are not left out here.
However, there are limitations to shielded ribbon cables. Because they have fire and stab resistance, the cooling rate is also meager.
There have been adjustments to shielded ribbon cables in recent times, and these advancements now make them safer to use and much more feasible.
Shielded ribbon cables consist of an outer shield made out of copper braids. Also, some ribbon cables are double-shield. Aside from the external protection, they have an inner foil that bridges contact between the wires and the outer shield.
PCIe Ribbon Cable Assemblies
A PCIe ribbon cable is a cable type with many flat wires put parallel and side-by-side. Hence, they look more like a ribbon cable. PCIe ribbon cables help transfer data at a fast rate. We can see more of its use in computer systems and mobile devices.
A PCIe ribbon cable
Color coding is essential in PCIe ribbon cables. So, users can avoid any unpleasant cases. Color coding helps in pin identification and prevents reverse connection. In line with this, one edge of the ribbon cable has a red color to tell pin 1.
Determining the size of a PCIe ribbon cable is similar to that of ribbon cables, and we can classify them into two, namely Pitch and Number of conductors.
The pitch is simply the spacing between two conductors in the ribbon cable. Some of the commonly used spacing is 0.05inches and 0.1 inches. The wires of t
Conclusion
Ribbon cables are indeed important for various connections of sorts. They play important roles in connecting various applications like mobile phones, laptops, and electronic devices.
These colored-looking cables are very efficient in producing second-to-none output results. They appear in various sizes and pitches. It is important to derive all its information to fully use the ribbon cable.
Fortunately, the information you require is available in this write–up. If you want to know more about how ribbon cables work, reach out to us at CLOOM Tech.
The introduction of flexible PCB technology resulted in innovation in electronic gadgets. You may be surprised that even laptops and smartphones also use this technology. In this blog post, let’s read about myths about flexible PCB assembly.
What are flexible PCB assemblies?
Flexible PCB assemblies refer to mounting components on the surface of the flexible printed circuit board or flex boards. They require thin laminates in their manufacturing. Manufacturers cannot assemble them directly on SMT lines as rigid circuit boards. First, these flex boards need to be fixed on some rigid career to be treated like rigid PCBs.
Caption: PCB
Flexible PCB assembly properties
Compared with rigid board assemblies, flex board assemblies have the following properties.
Flexible nature
The assembly of flexible printed circuit boards and their soldering is unlike the assembly of rigid PCB boards due to the flexible nature of flex PCBs. It is essential to use a special carrier board for flexible PCB assembly for fixing, transmission, and completing the surface mounting of the components.
Low density
Manufacturers use flexible PCBs for some module connections. As a result, the circuit density on the flexible PCB is relatively low. The number of electrical components remains under 50, and some flex boards only have as few as two connectors.
A large number of panels:
Miniature electronic devices like smartphones and digital cameras make maximum use of flexible PCBs; thus, the board size is small. As said above, the number of components in the flex circuits board is also low. Therefore, to improve the efficiency of the PCB, manufacturers use panels for assembly, which are later separated through punching.
Wide application of auxiliary fixtures
The flexible PCB assembly process uses many institutions as it damages and deforms easily. These fixtures include a board carrying tray, PCB baking fixture, function test fixture, cutting fixture, and electrical test fixture.
High-quality product requirement
Components must meet application requirements because flexible PCBs are mainly sued in applications requiring repetitive bending and accuracy. Thus, it is essential to maintain cleanliness, have soldering reliability and take antistatic precautions.
High assembly cost
As the Flex PCB assembly process needs different fixtures, a low rate of equipment utilization, high accessories demand and longer manufacturing time, and higher standards for product quality, the assembly cost goes high compared to rigid PCBs.
Caption: high tech electronic PCB
Design consideration of Flexible PCB assembly
The three crucial flexible PCB specifications include:
Material of Flexible PCB:
The materials you need to manufacture the flexible PCB include a metal conductor layer, adhesive, substrate material, and cover layer. The primary material is the flexible insulating film, which acts as a carrier with superb electrical and mechanical performance. Other ordinary materials include polyimide film and polyester, from which polyimide film is most common. Other substrate materials, such as thin FR4 and PEN, are also included.
Structure of flexible PCB:
You can classify flexible PCB into these different categories:
Single-sided flexible PCBs have a simple structure and are very easy to fabricate.
Double-sided flex PCB has a more complicated structure than single-sided PCB, and thus you may face more control difficulties.
Multi-layer Flex PCB has the most complicated structure as it has more than two layers. It becomes more difficult to control its fabrication quality.
Single-sided rigid-flex boards.
Double-sided rigid-flex boards.
Multi-layer rigid-flex boards.
Bend radius:
The bend radius of flex PCB varies typically between 5mm to 11mm.
Flexible PCB assembly process
The flexible PCB assembly process’s success depends on the board’s consistency, position accuracy, and flatness. Here is the process of the flex circuit assembly.
FPC pre-treatment
The FPC board tends to absorb moisture during transportation and storage. If manufacturers do not extract this moisture, it will vaporize during reflow soldering and protrude from the FPC board in the form of water vapor. To avoid this situation, FPC boards go under baking at a high temperature of around 80-100°C for about 4-8 hours. Sometimes, the baking temperature goes up to 125 degrees Celsius, but manufacturers must shorten the baking time. Generally, experts advise not to stack the FPC too much, and 10-20 PNL is more than enough.
Sometimes, manufacturers also put a piece of paper between each PNL to ensure isolation between different layers. Makers ensure that FPC does not undergo discoloration, warping, deformation, or other defects. They put it into line only after IPQC qualifies it.
Production of FPC assembly fixture
After baking, manufacturers study the drilling hole layers of FPC to develop an FPC positioning template and carrier fixture. Makers ensure that the positioning template pin diameter is the same as that of the positioning hole on the carrier board and the hole diameter of FPC. FPCs may differ in thickness to protect certain parts of the section or for design reasons.
Thus, the carrier board and the FPC must follow a similar order process. The main aim is to keep the FPC flat during placement and printing. Further, it is also essential that carrier boards comprise light and thin material with low heat absorption, fast heat dissipation, high strength, and little warpage deformation. Common carrier material includes synthetic stone, silica gel plate, aluminum plate, etc.
Positioning of FPC:
Once manufacturers fix the FPC on the carrier board, the printing, soldering, and mounting time should be as little as possible. Thus, they ensure that FPC fixes on the carrier board accurately. There are two carrier boards, one with positioning pins and the other without.
The carrier board without positioning pins works with the one with positioning pins on the positioning template. To fix the carrier board on the template, first put the carrier board on the template so that positioning pins come out from the holes of the carrier boards. Now, put the FPC piece-wise. Now, fix the pins with the tape and remove the FPC board from the template to proceed with printing, soldering, and patching. Manufacturers fix the carrier board with the help of several positioning pins of 1.5mm in length, and they can put the FPC on spring positioning pins and fix them with tape.
While fixing the FPC board on the carrier board, manufacturers use single-sided tape so that FPC does not shift or warp. Here, the tape viscosity is moderate, so makers can easily peel off after the reflow soldering process. Sometimes, Assembly makers also use automatic tape machines to cut tapes of similar lengths to improve efficiency and to make them cost-effective.
Besides the above method, manufacturers sometimes use double-sided tape to fix the carrier board to the FPC.
FPC solder paste printing:
The solder paste composition does not matter much for FPC, and the metal or size only depends on the presence of the fine-pitch ICs. However, FPC does have special requirements for solder paste printing. The solder paste must be convenient to print, have excellent thixotropy, and be firmly attached to the FPC. The soldering flux printer has an OP system or optical positioning to improve printing quality. Despite a proper fixation of the FPC and carrier board, some gaps remain. Thus, set equipment parameters appropriately to get the best printing effect.
FPC assembly:
Manufacturers use high-speed placement machines based on the components’ number, product characteristics, and the efficiency of placement needed. Due to the optical marks on FPCs for positioning, the surface mount technology on FPC and rigid circuit boards remains more or less the same.
As mentioned above, there are always some gaps between the carrier circuit board and FPC. Hence, manufacturers ensure the accurate setting of blowing pressure; the suction nozzle drops its height and other equipment. You must also know that as FPCs are connected boards, their yield is always low. Thus, the complete PNL has some damaged PCS. Thus, the placement system should have a function for bad mark identification to enhance production efficiency.
FPC reflow soldering
Manufacturers use hot air convection reflow (infrared) so that temperature in FPC changes more uniformly, avoiding poor soldering.
Flex PCB Assembly Production Equipment
With the help of the equipment, production can be efficient.
Solder paste printer
The paste printers have plate loading imprinting, the addition of solder paste, and transferring circuits. To use it, fix the flexible board on the top of the printing table. Print the solder paste/red glue on the pad via stencil and left scrapers. Next, put a transfer station into the machine to place the components.
Pick and place machine.
In the production line, you may also know it as a mounting machine or surface mounting system. It is a form of a device that you place on a flex PCB pad. Manufacturers configure it once the solder paste printer is and use the placement head for mounting the surface components accurately.
Reflow soldering
A heated circuit heats the nitrogen and air in reflow soldering to generate high temperatures. The soldering on the components’ sides melts, creating a tight solder joint with the motherboard. Reflow soldering can easily control the temperature and avoid oxidation.
AOI detector
AOI, or automatic optical inspection, is equipment to detect common defects during welding production. Based on the optical principle, it is a newer technology that manufacturers are rapidly adopting. Now, you can also find AOI test equipment in the market.
During the AOI inspection, the equipment scans the flexible circuit assembly with the help of a camera, collects the images, and compares the junctions with the approved database parameters. Once the image processing is complete, it will mark the defects with the automatic signs or display. The maintenance personnel takes out the defective pieces for repair.
Component trimming machine
You can cut and arrange the components with the help of this machine.
Wave soldering
It can ensure that the board’s soldering surface is in touch with the high-temperature soldering liquid tin so that soldering occurs perfectly. The liquid tin creates a slope, forming a wave-like process with the help of a particular device. Here the primary material is solder bars.
Tin furnace
In electronic welding, the tin furnace is the welding tool. The tin furnace gives good welding consistency in discrete flex boards. The process is fast and easy and delivers high efficiency.
Cleaning machine
You can clean the flex circuit board and remove the residue after soldering with the help of this machine.
ICT test fixture
ICT test fixtures help test short circuits, open circuits, and welding conditions of different parts. Technicians use test probes to check the PCB layout’s test points.
FCT test fixture
This Functional test checks the flex boards in simulated working conditions and whether the tested PCB boards will work in different design states. With this, the manufacturers get the values of different states to confirm the unit under test.
Aging test frame
In this test rack, PCB assemblies are tested in batches by pretending the user’s operation for extended periods.
Conclusion
We would like to know how the flex PCB fabrication and assembling process is completed. If your application requires any help regarding the flex PCB and assembling service, contact Cloom. We design, manufacture, and customize all types of Printed circuit boards and wire harnesses to meet our customers’ every need.
About DVI cable assembly, Cathode Ray Tube monitors require analog signals to get image data from the computer graphics card. Here, you will need DVI cables to convert the original digital signal into analog to support these CRT monitors. Similarly, digital display devices like LCDs needed to be compatible and adapt with analog source devices like old computers. As a result, the analog output signals were converted into digital. Also, when LCDs were introduced as digital display devices, they needed to convert analog output signals into digital ones. As both computers and LCDs accept digital signals, there was an unnecessary conversion of signals from D/A to digital. Further, the process also made the signal weak and low in quality. The DIV digital connection eliminated this conversion process and minimized the information loss and accuracy.
The versatile nature of the DVI interface gave manufacturers the flexibility to support digital devices and be compatible with analog devices. How does the DVI cable assembly make things happen?
DVI Cable Assembly: What is DVI?
DVI is an abbreviated form of Digital Video Interface. It maximizes the flat panel of the LCD and Video graphic cards. The DVI format has replaced the Plug & Display (P&D) standard or an advanced version of the DFP format. Video cards have one or more than one DVI output port.
Apart from being a typical computer interface, it was a digital transmission method for High Definition TVs and other displays. Even the topmost DVD players had DVI outputs, the component video output (analog). However, today, the DVI is used explicitly for computers only, and the High Definition Multimedia interface has become more popular for TVs and DVDs.
Caption: Dvi digital pc video connectors
DVI Cable Assembly: What are DVI connector types?
DVI-I, DVI-D, and DVI-A have different pins for digital and analog signals. Equipment manufacturers use DVI ports with open pinholes to support both digital and analog signals. DVI connectors with open pin holes do not mean they will support both digital and analog signals. It pins defensive measures to avoid pins breakage if you accidentally insert the wrong cable. You can verify the DVI connector either through its label or manual.
Let’s understand these three DVI formats in detail.
DVI-D: Truly Digital Video
DVI-Digital cables set a direct digital connection between the source and LCD or liquid crystal display monitors. As a result of direct connection and digital format, you get high-quality video displays too fast. The video cars first create a digital signal of videos.
A VGA output converts this digital signal into analog, which travels through the cable to the LCD display. At the receiving end, the signal again converts into digital. However, DVI-D has no such conversion process as it sets direct connections digitally.
DVI-Analog: High-Resolution analog
When connecting a VGA monitor to a DVI computer, you will need a DVI-A cable, as both these ports carry the same signal. The DVI-Analog cable has DVI signals to analog displays like LCD and CRT monitors. However, you will experience some signal quality loss due to the conversion from D/A.
DVI-I: The best of both
DVI-I (digital and analog) cables can transfer D/D or A/A. The versatile nature of these integrated cables makes them suitable for both digital and analog situations.
You must understand that you cannot interchange DVI analog and DVI digital formats, meaning a DVI-Digital cable assembly will never work for a DVI-Analog system. You will need a VGA to DVI-Digital converter for connecting an analog device to a digital system. Similarly, you will need a DVI-D to VGA converter to connect the digital source to an analog display.
Caption: computer connectors for connecting monitors
DVI Cable Assembly: What are single links and dual links?
There are different forms of DVI digital formats, namely, DVI-Digital single link / dual link and DVI-Integrated single link cable/ DVI-I dual link type connectors. The DVI cables transmit information through TMDS. The cable’s bandwidth capacity makes the single and dual-link different. A single link cable uses only one 165Mhz TMDS transmitter, and the dual link uses two. As a result, the latter becomes more powerful and transmits information at incredible signal quality and speed. For example, a single-link DVI can give a low resolution (1920*1200) compared to a high resolution (2560*1600) of a dual-link DVI.
Are single-link/ dual Link Digital Visual Interfaces compatible?
You can use a dual-link in place of a single link, but that is not possible vice versa. Similarly, you can use DVI-I cable assemblies for DVI-D cable assemblies. If you use dual-link connectors for single-link purposes, the PIN on the female connector will be the limiting factor.
What is an M1/P&D/30-Pin DVI connector?
When a connector’s width is more than a standard DVI connector, it is a VESA P&D connector. You can also call these 30-pin DVI M1 connectors, and you can find them in projector breakout cables carrying digital and analog video signals.
How do you connect DVI and VGA?
Depending on the connectors present on your display and the source, you can convert:
When the source is DVI and the monitor is VGA: You will require a DVI-to-VGA adapter for a DVI-I source. On the contrary, you will require a DVI-D to VGA adapter for a DVI-D source.
When the source is VGA and the monitor is DVI: In this case, you can use a DualHead2Go VGA to Dual HDMI/DVI Converter or VGA to HDMI/DVI converter.
How do you connect DVI and HDMI?
You can convert DVI into HDMI through an adapter or a cable.
How do you connect DVI and DisplayPort?
Use an adapter that connects DisplayPort to DVI to connect the DisplayPort source to the DVI display.
Conclusion
DVI cables can improve the visual and photo quality of your electronic devices. Choosing the wrong cable will not disappoint you in picture quality, but it can cause damage to your ports. Get the help of professionals to select the right cables for your job.